
My friend Dave needed a power plant to go with his new Apache paper mill that he was adding to his Apache Railway branch, so I offered to combine his power plant kit with some leftover parts I had from an earlier version of the same kit.
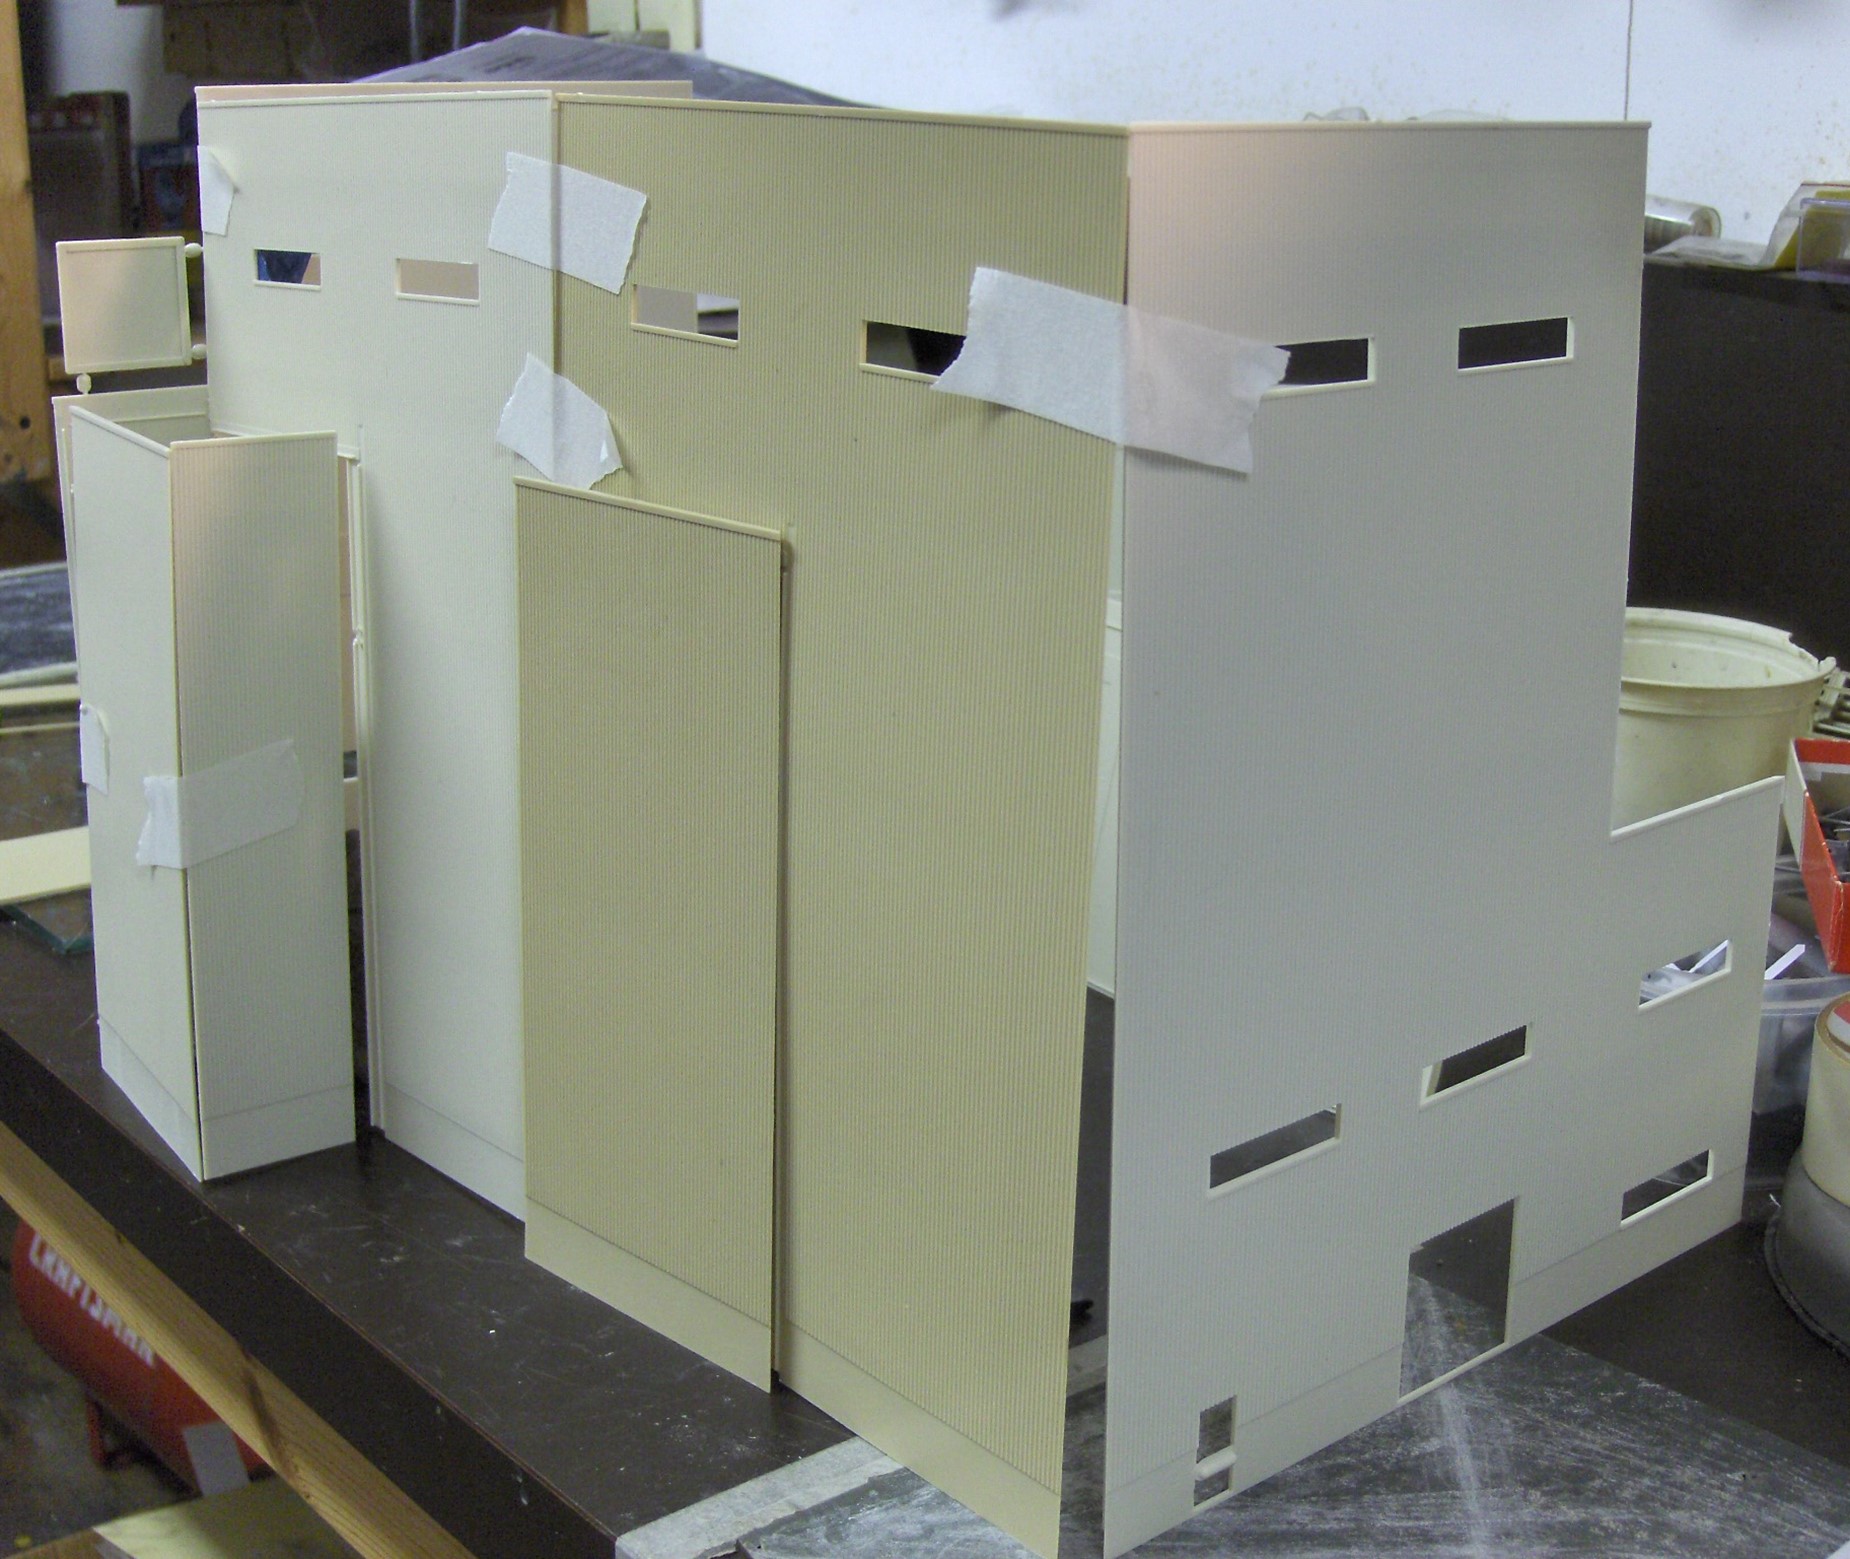
As always, I didn’t want the finished model to look like the art on the kit box, so I made a quick mock up with the spare parts using masking tape and learned that I had enough material to double the size of the plant. To be on the safe side, I also decided to enlarge the main doors to accommodate a railroad car.
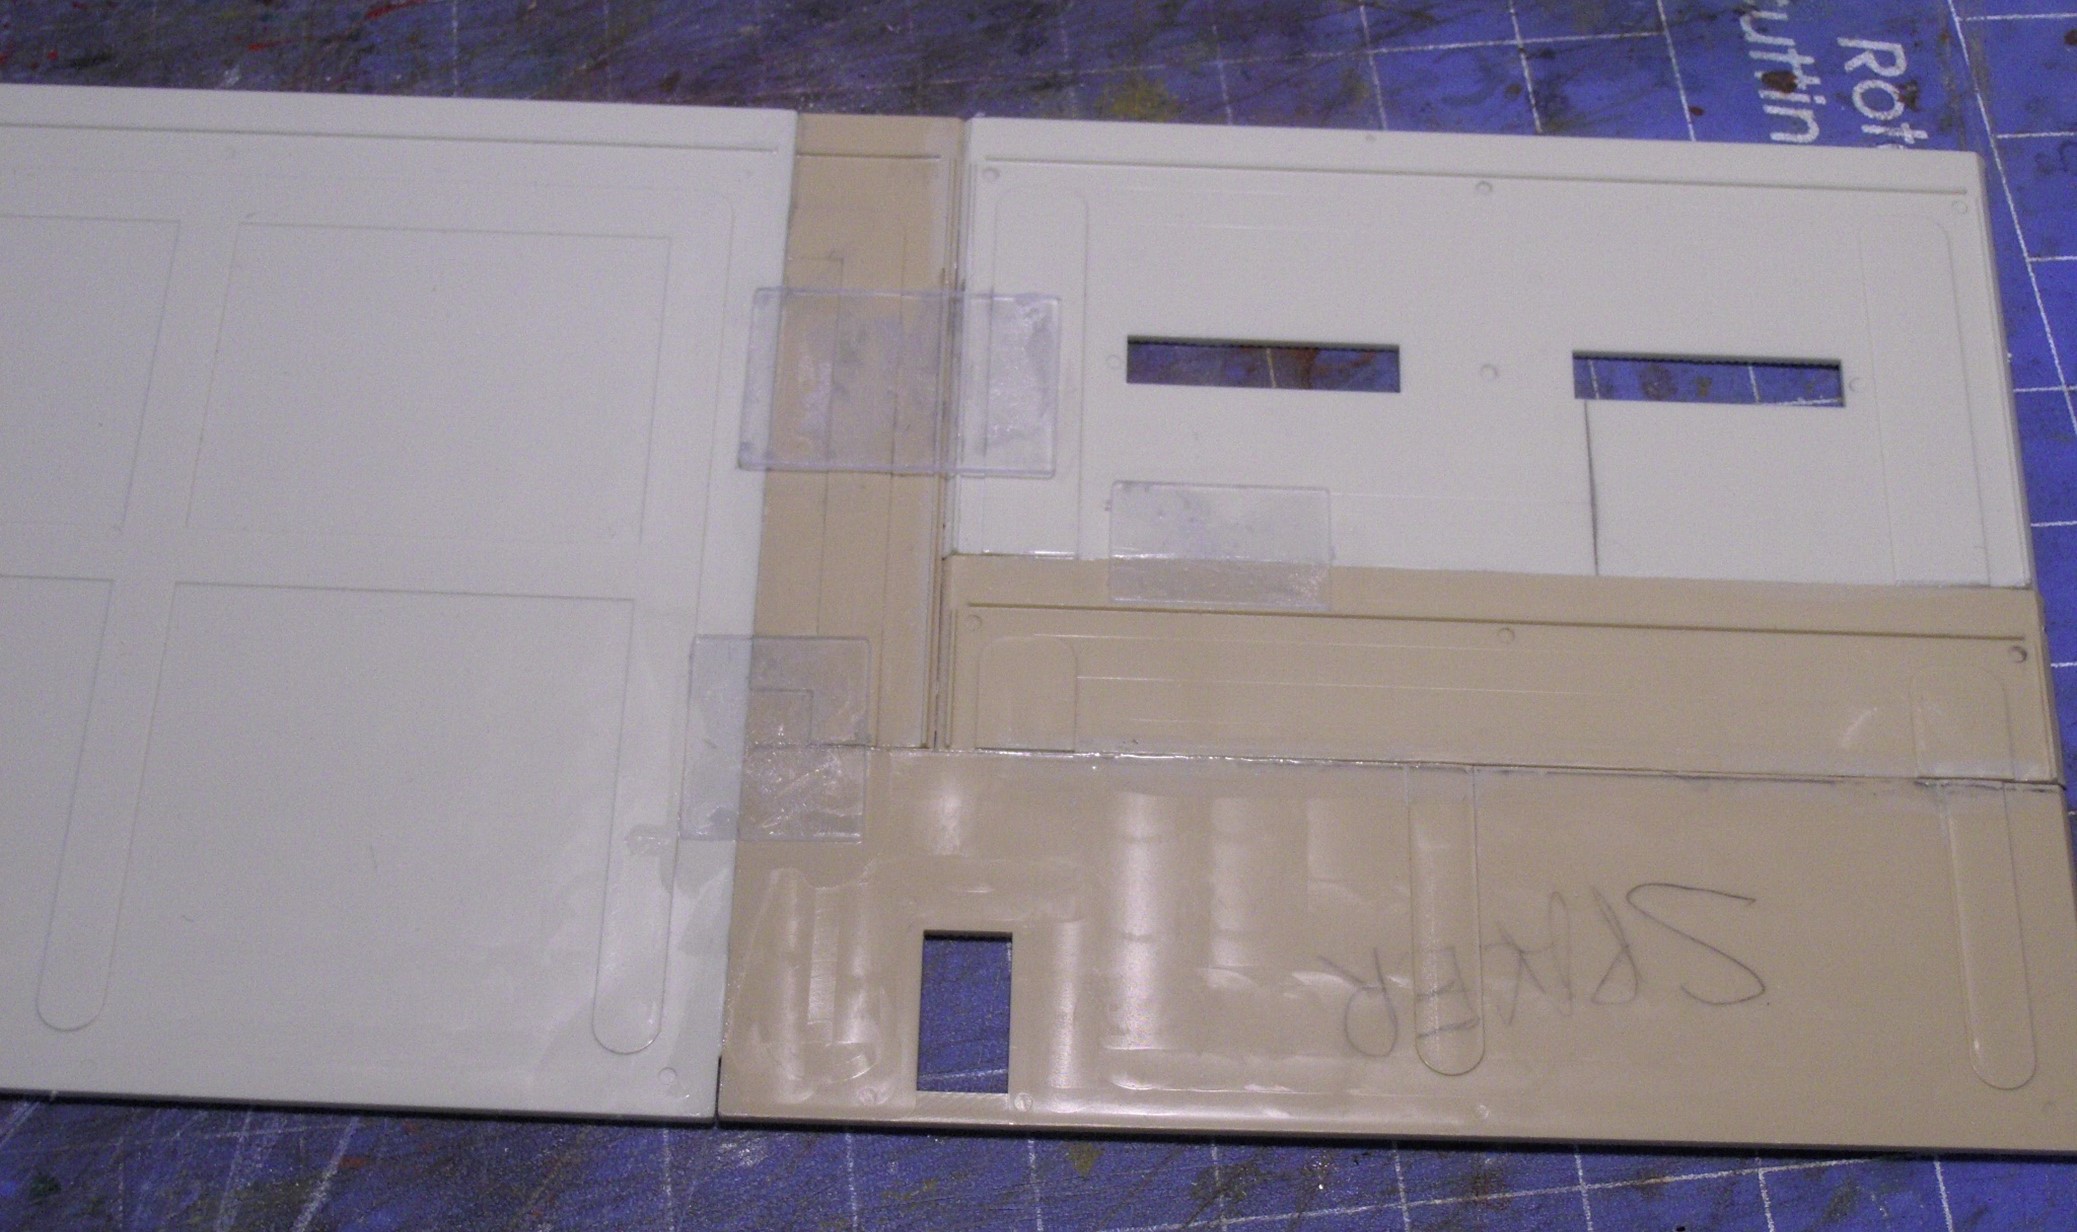
The secret to this project’s success was combining the extra parts I had with the kit parts. This involved a bit of cutting and fitting, and finally splicing clear styrene strips on the back to reinforce the joints. I worked carefully to ensure that all the new larger sides were the same height and length.

Of course, there were visible seams where I had combined the different parts. My joints were carefully fit, but several lines were still apparent where the new parts had been incorporated, so I decided to hide them with clever details. Here you can see a ladder and some ventilation ductwork I created to camouflage the seams. This worked very well to solve the problem.
Here is what the seams looked like before I added all the nice details to hide them. I used liquid cement to combine all the pieces. Also, notice how much larger the railcar door is now.
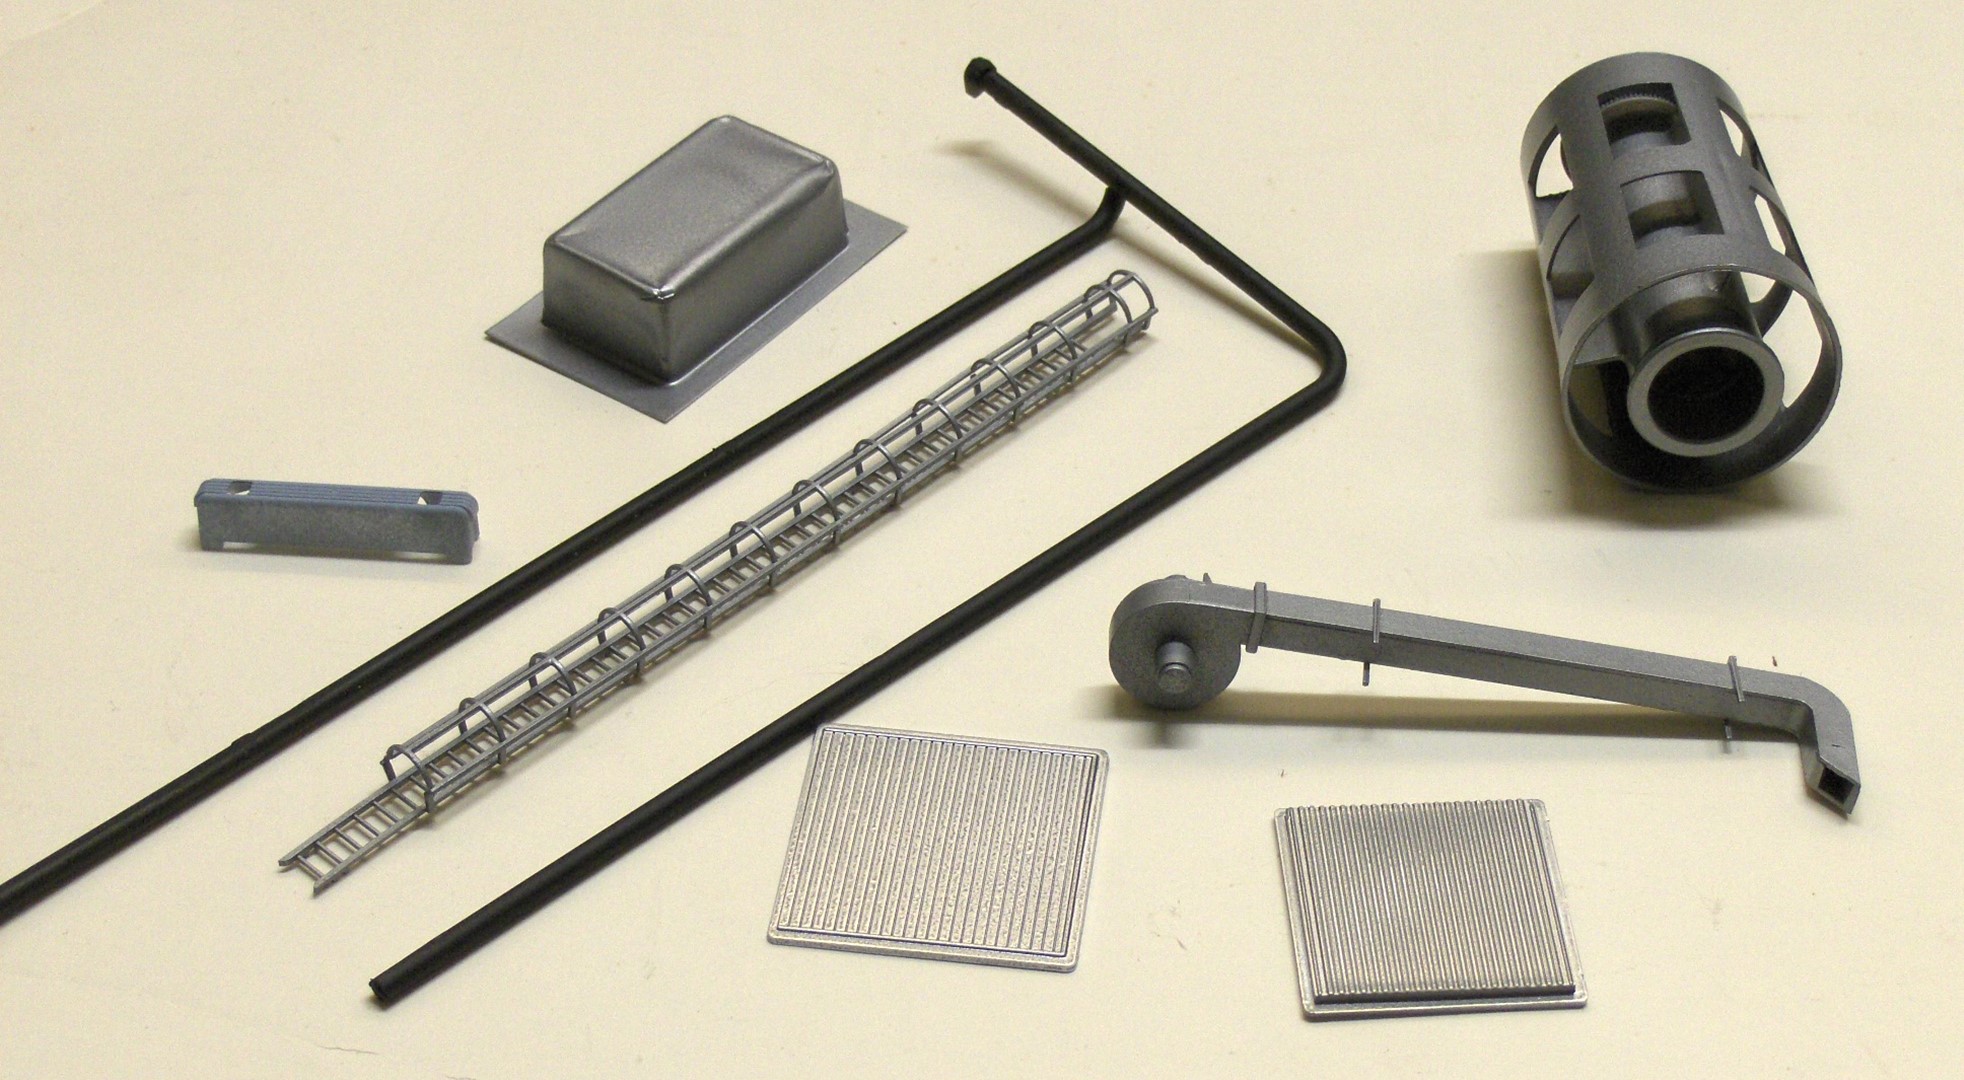
Here are a few of the extra pieces that will cover the seams and become roof details. On industrial buildings, you can never have too many interesting details.
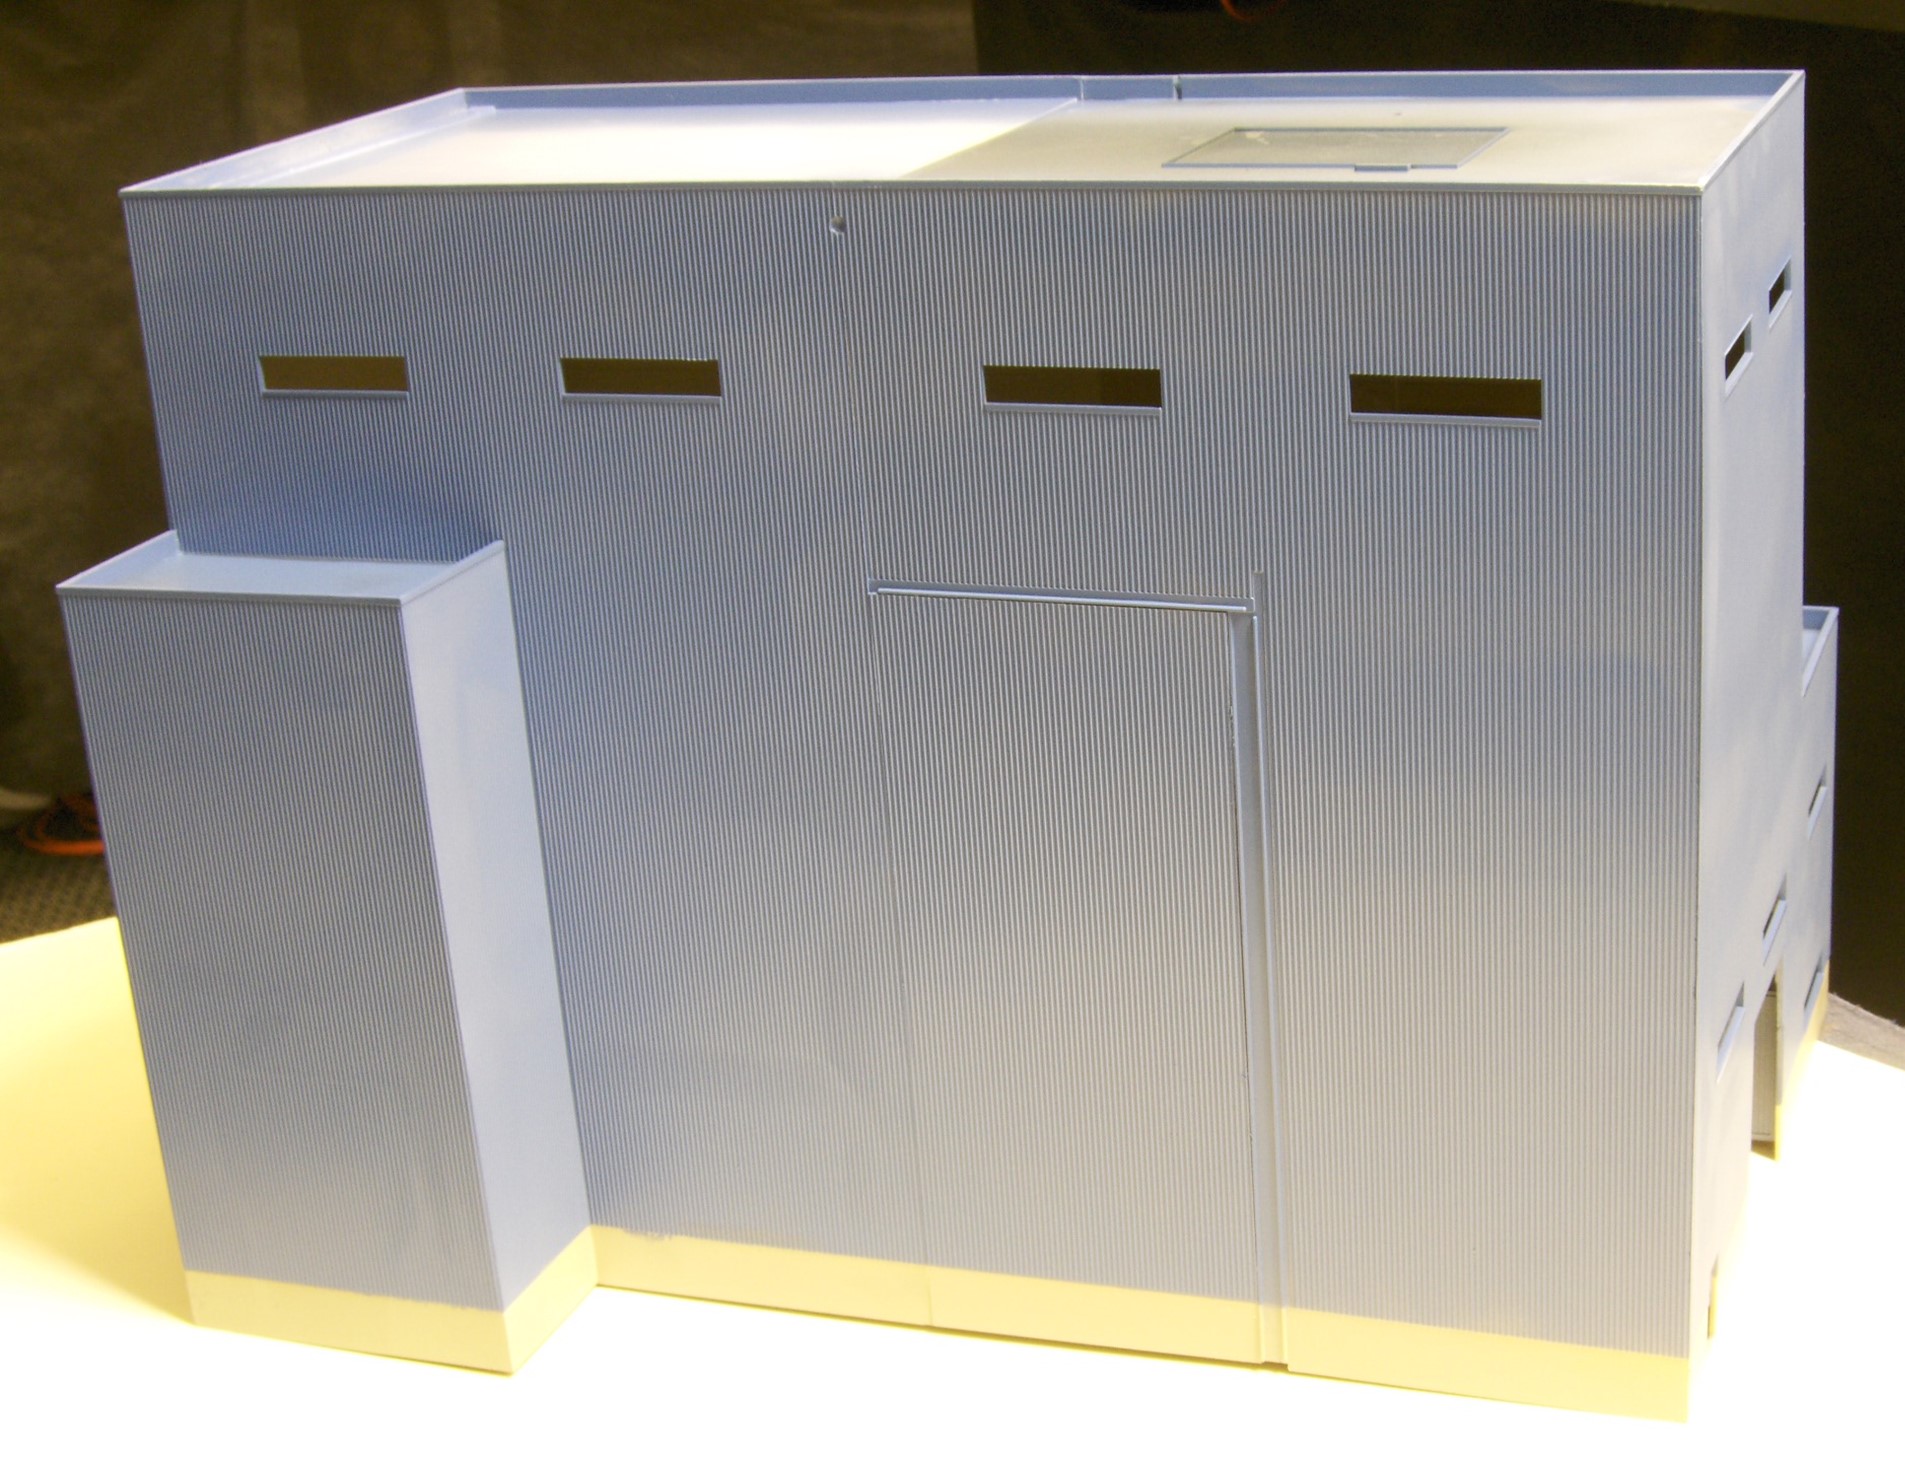
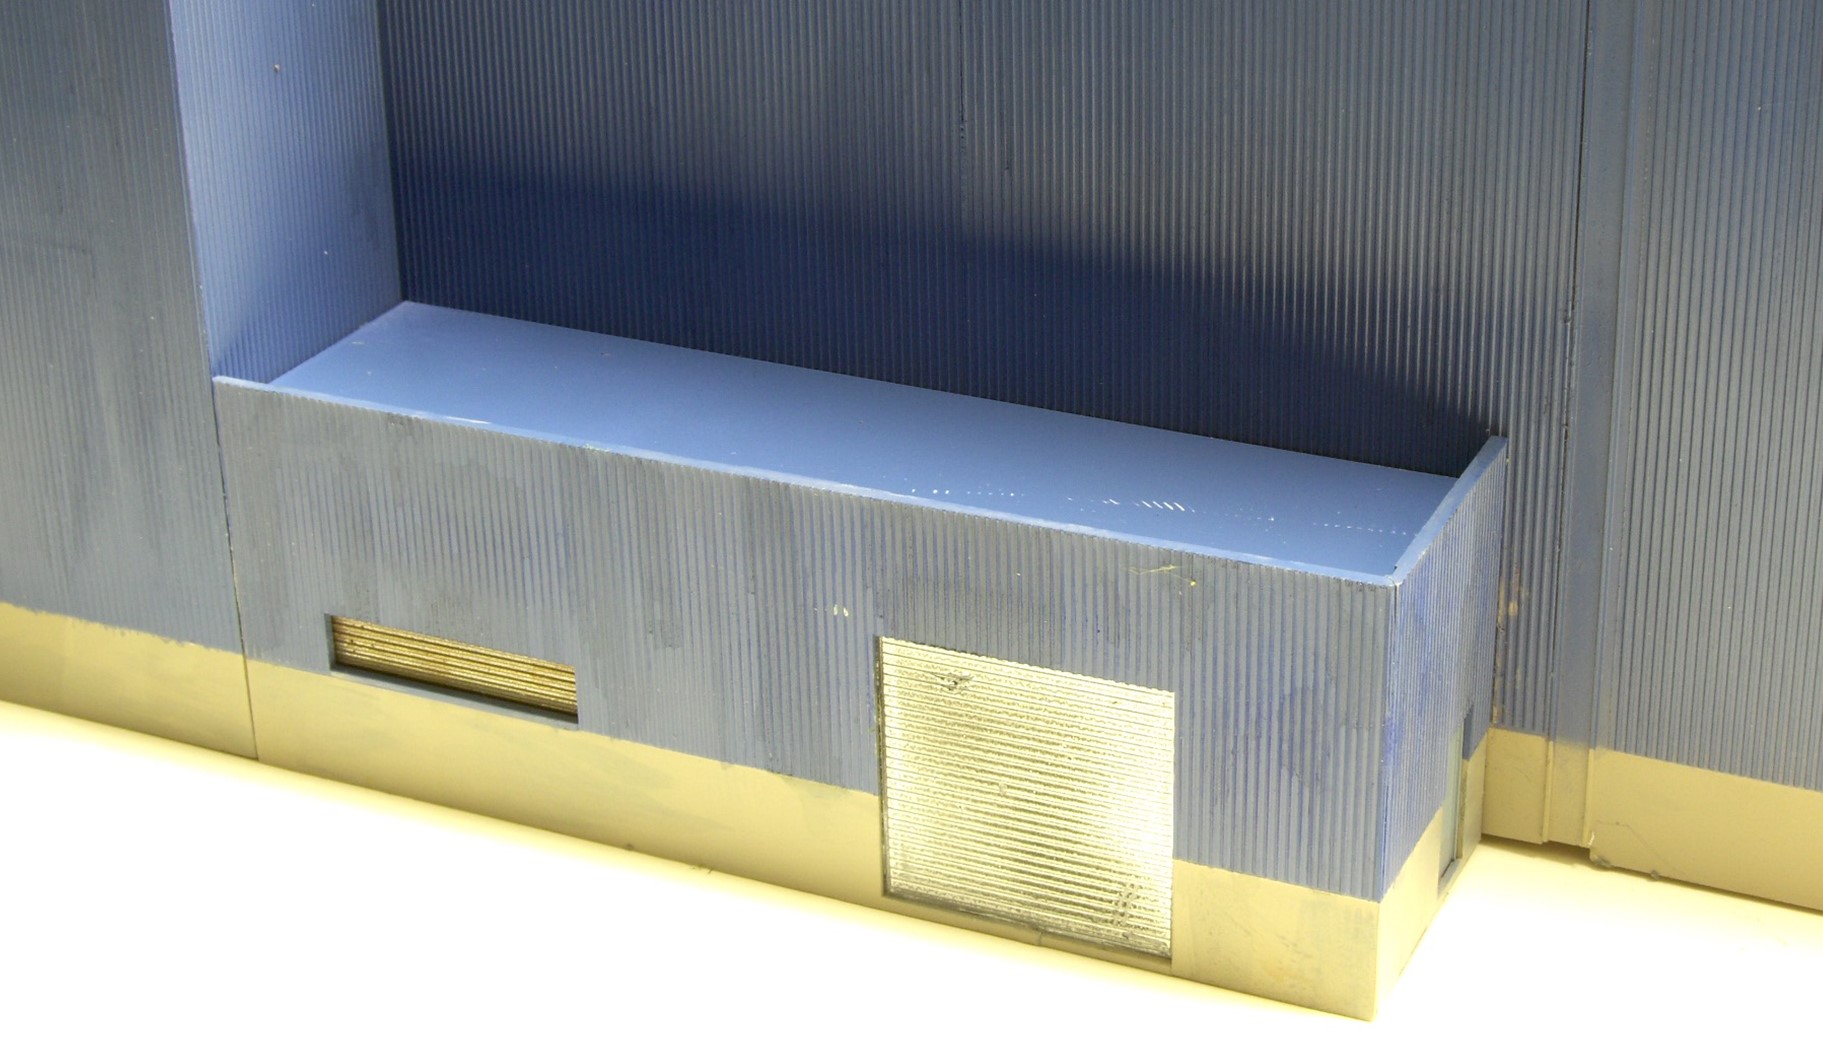
The building received a coat of paint the color of concrete for the foundation, and after it dried I masked the area and sprayed on a layer of blue paint. Painting the building one solid color makes the parts appear more cohesive, but the seams are still clearly there. We’ll take care of this later.
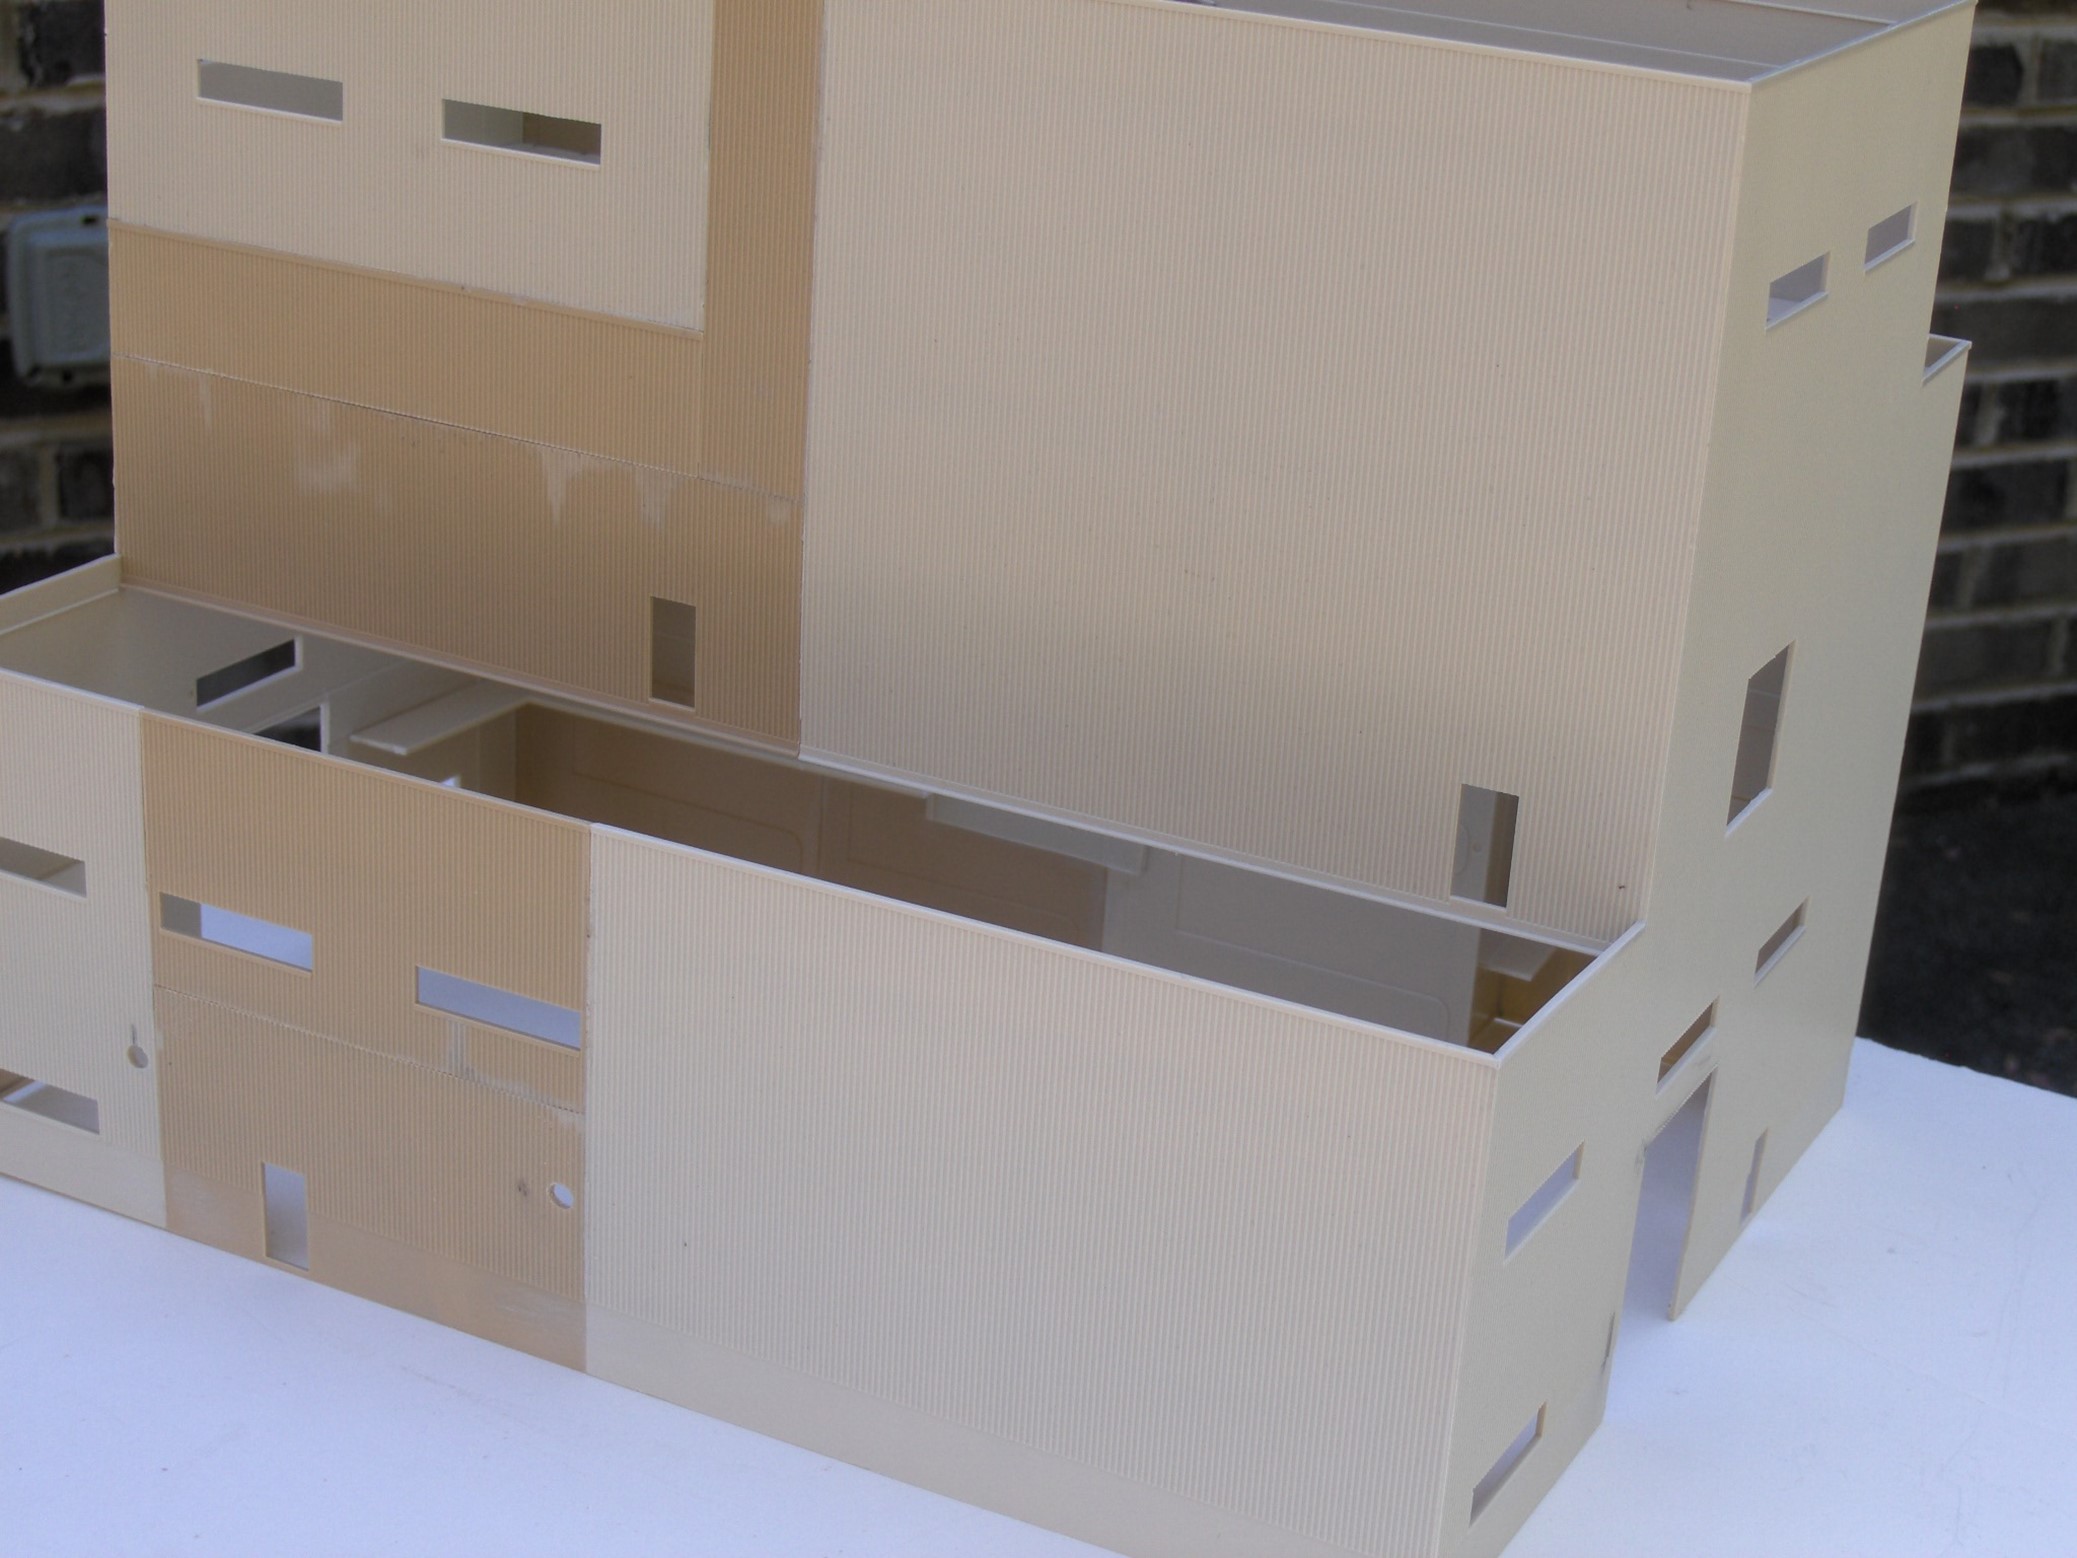
To make the building more interesting, I cut extra pieces for an annex and glued them into place. This is a great way to make the model more unique so that it will not be identical to what someone else may have on their railroad.
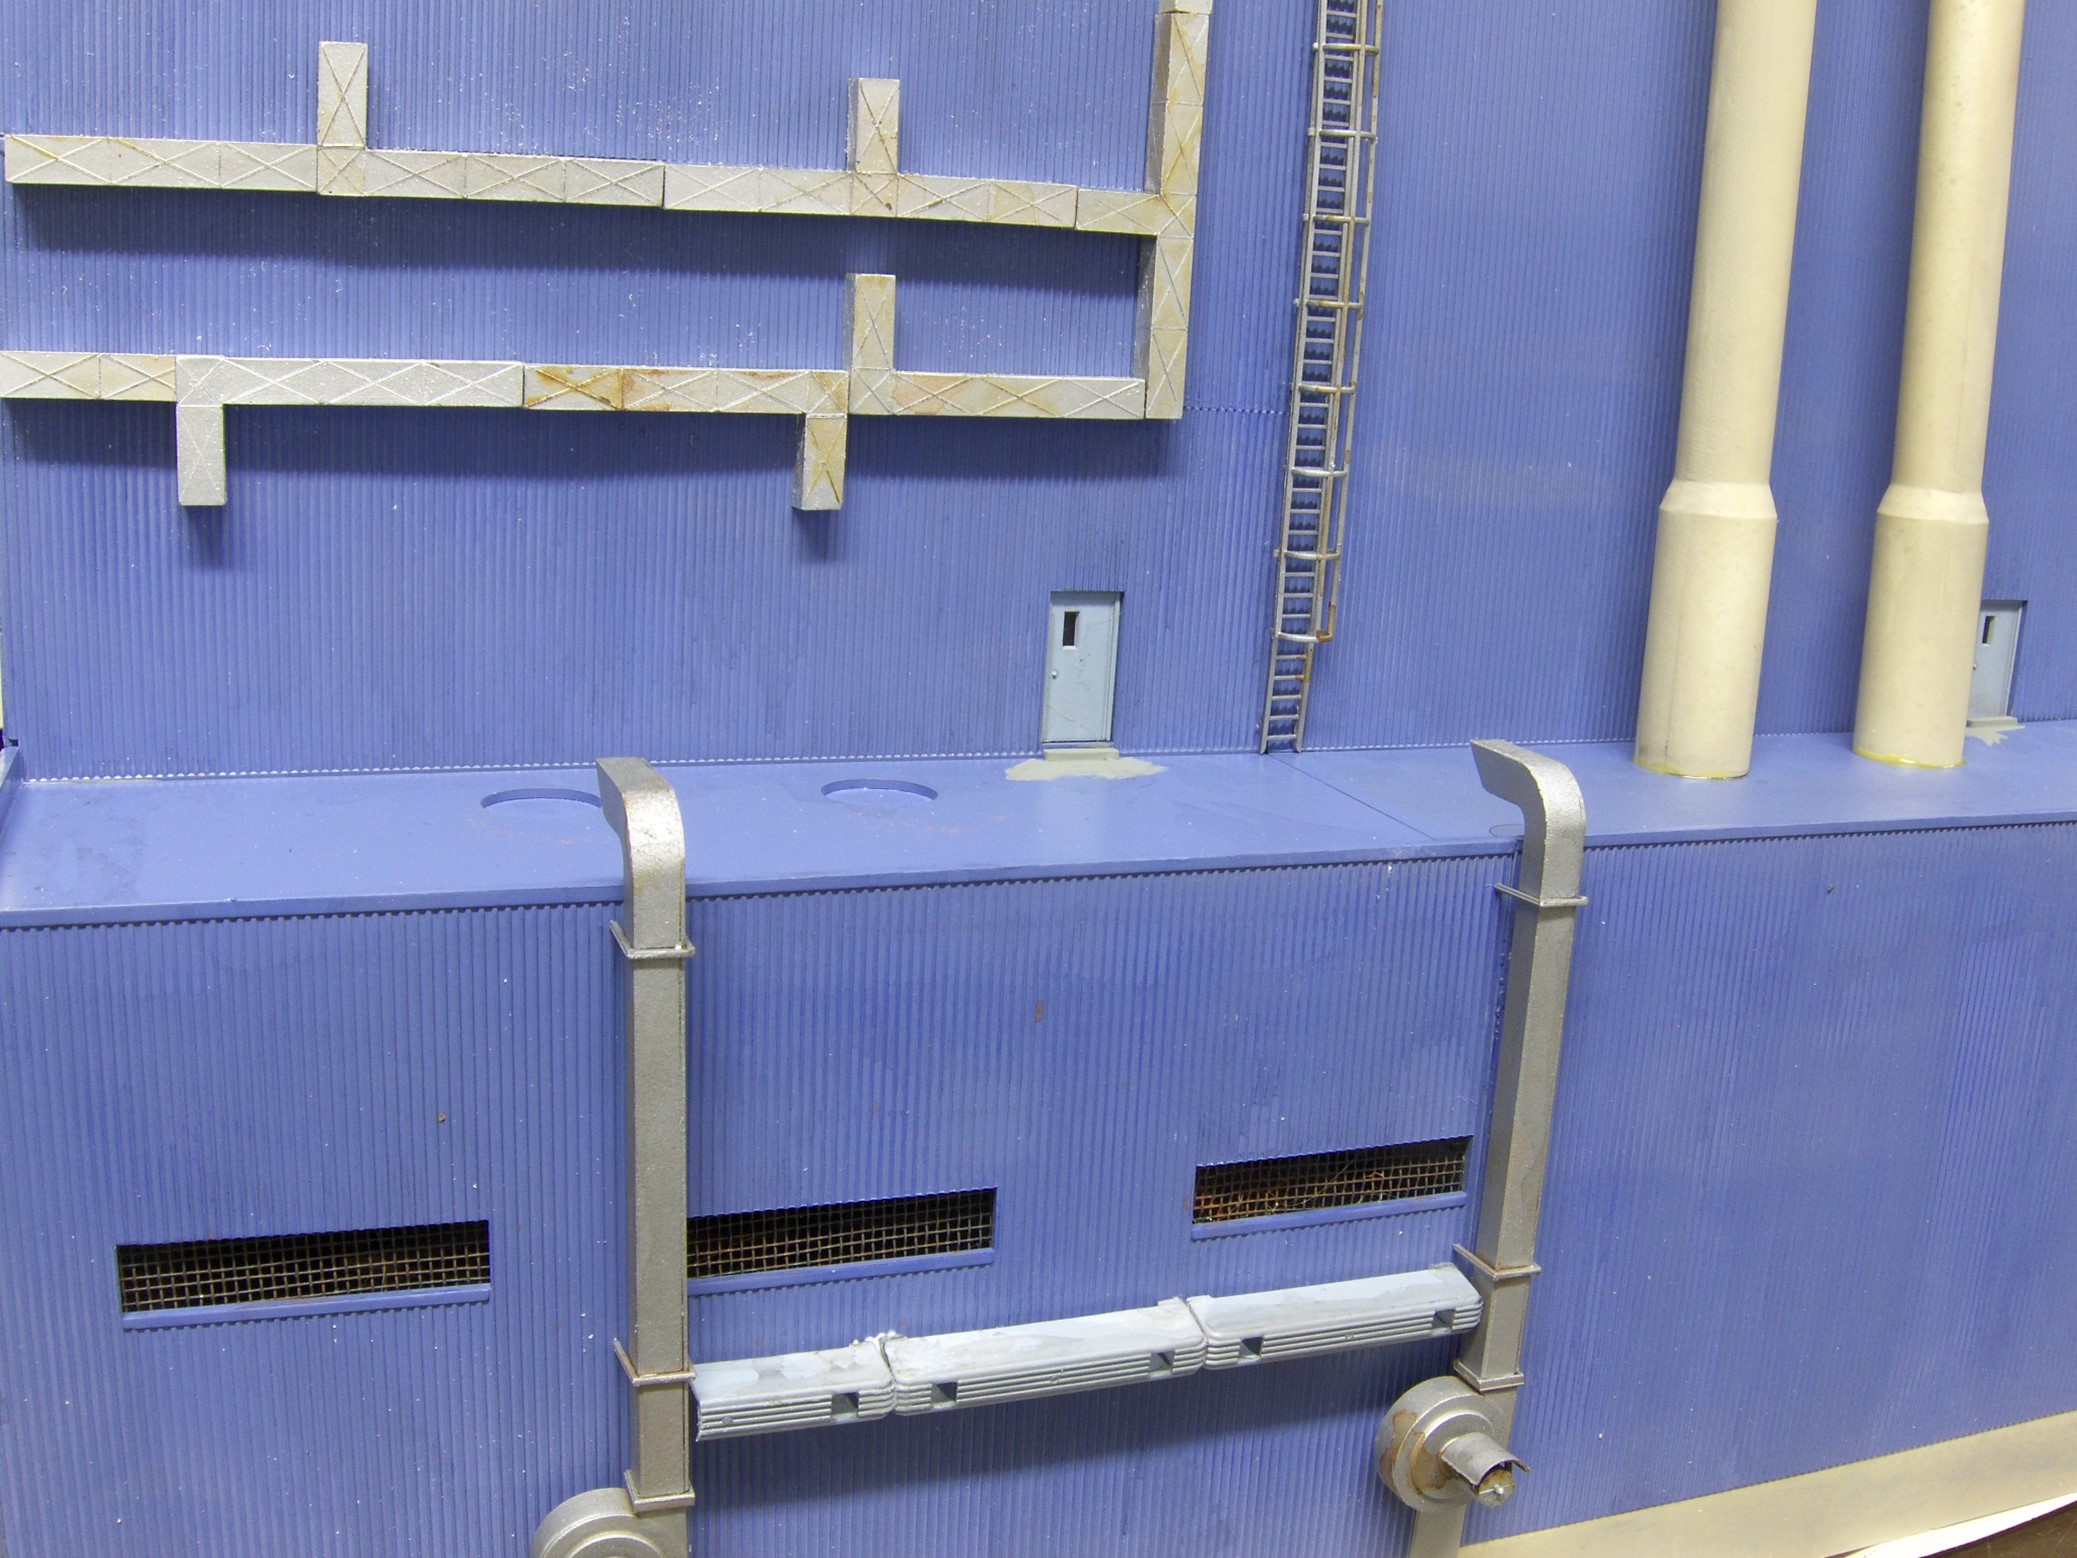
Here you can see how all the seams have magically disappeared. By the way, the tubing between the vertical ducts is actually the packaging from razor blades painted gray. I always save interesting parts like that for use on my buildings. If you look at the windows, you’ll see I ran out of kit window material, so I substituted screen wire to represent vents. They look pretty good after an application of rust color!

I sprinkled gravel on the roof using a spoon and brush for exact placement, then dripped diluted white glue on the gravel to permanently bond it. Before applying the glue, it’s always a good idea to “wet” the area with isopropyl alcohol. This allows the glue to spread out and adhere better to the surface.
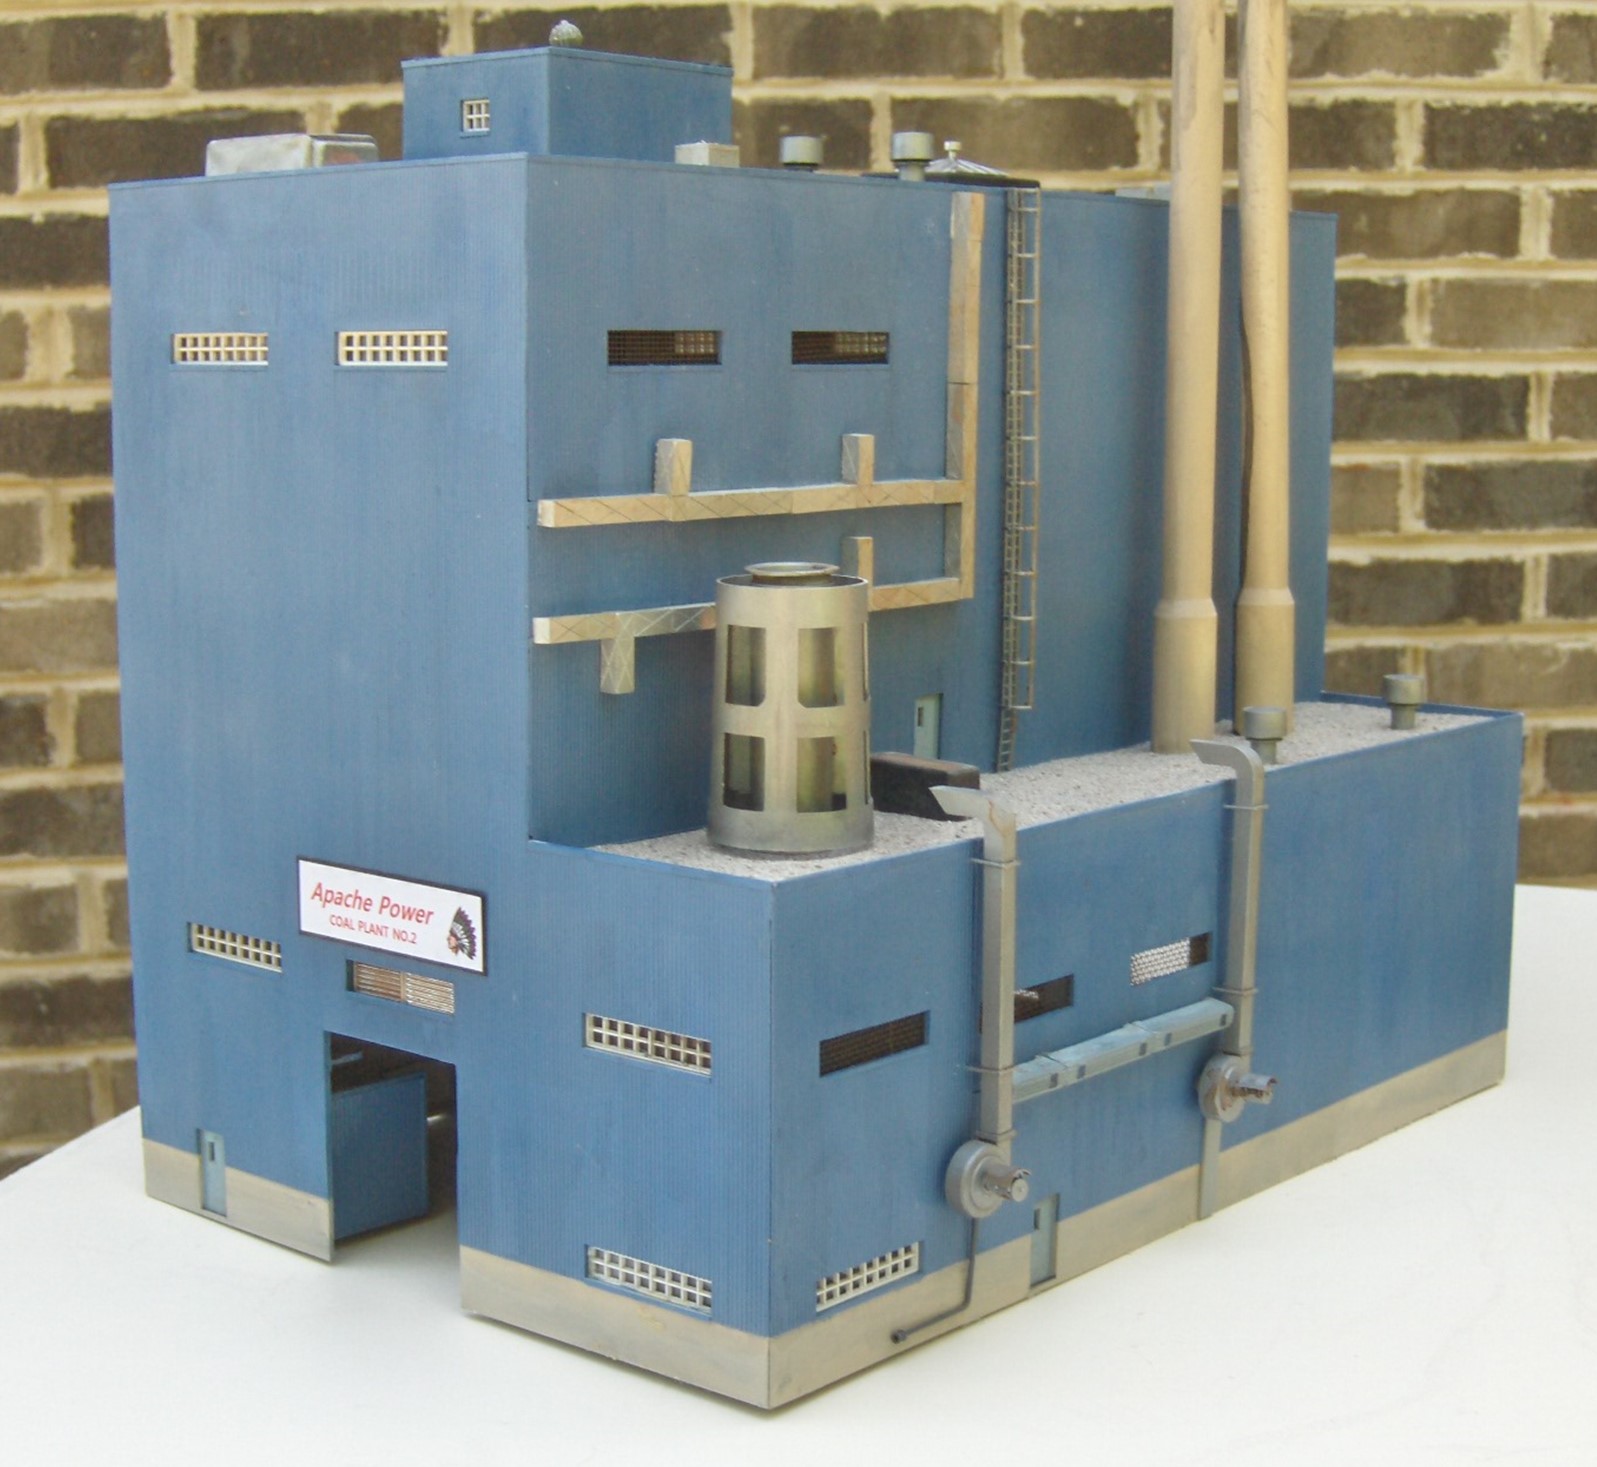
Here is the completed building with all the details added. Notice inside the door there is a blue wall which suggests that the inside is not completely empty. It’s now ready to join the paper mill on Dave’s layout.
Useful article, thank you.
Great workmanship !
Looks good.Paul R.