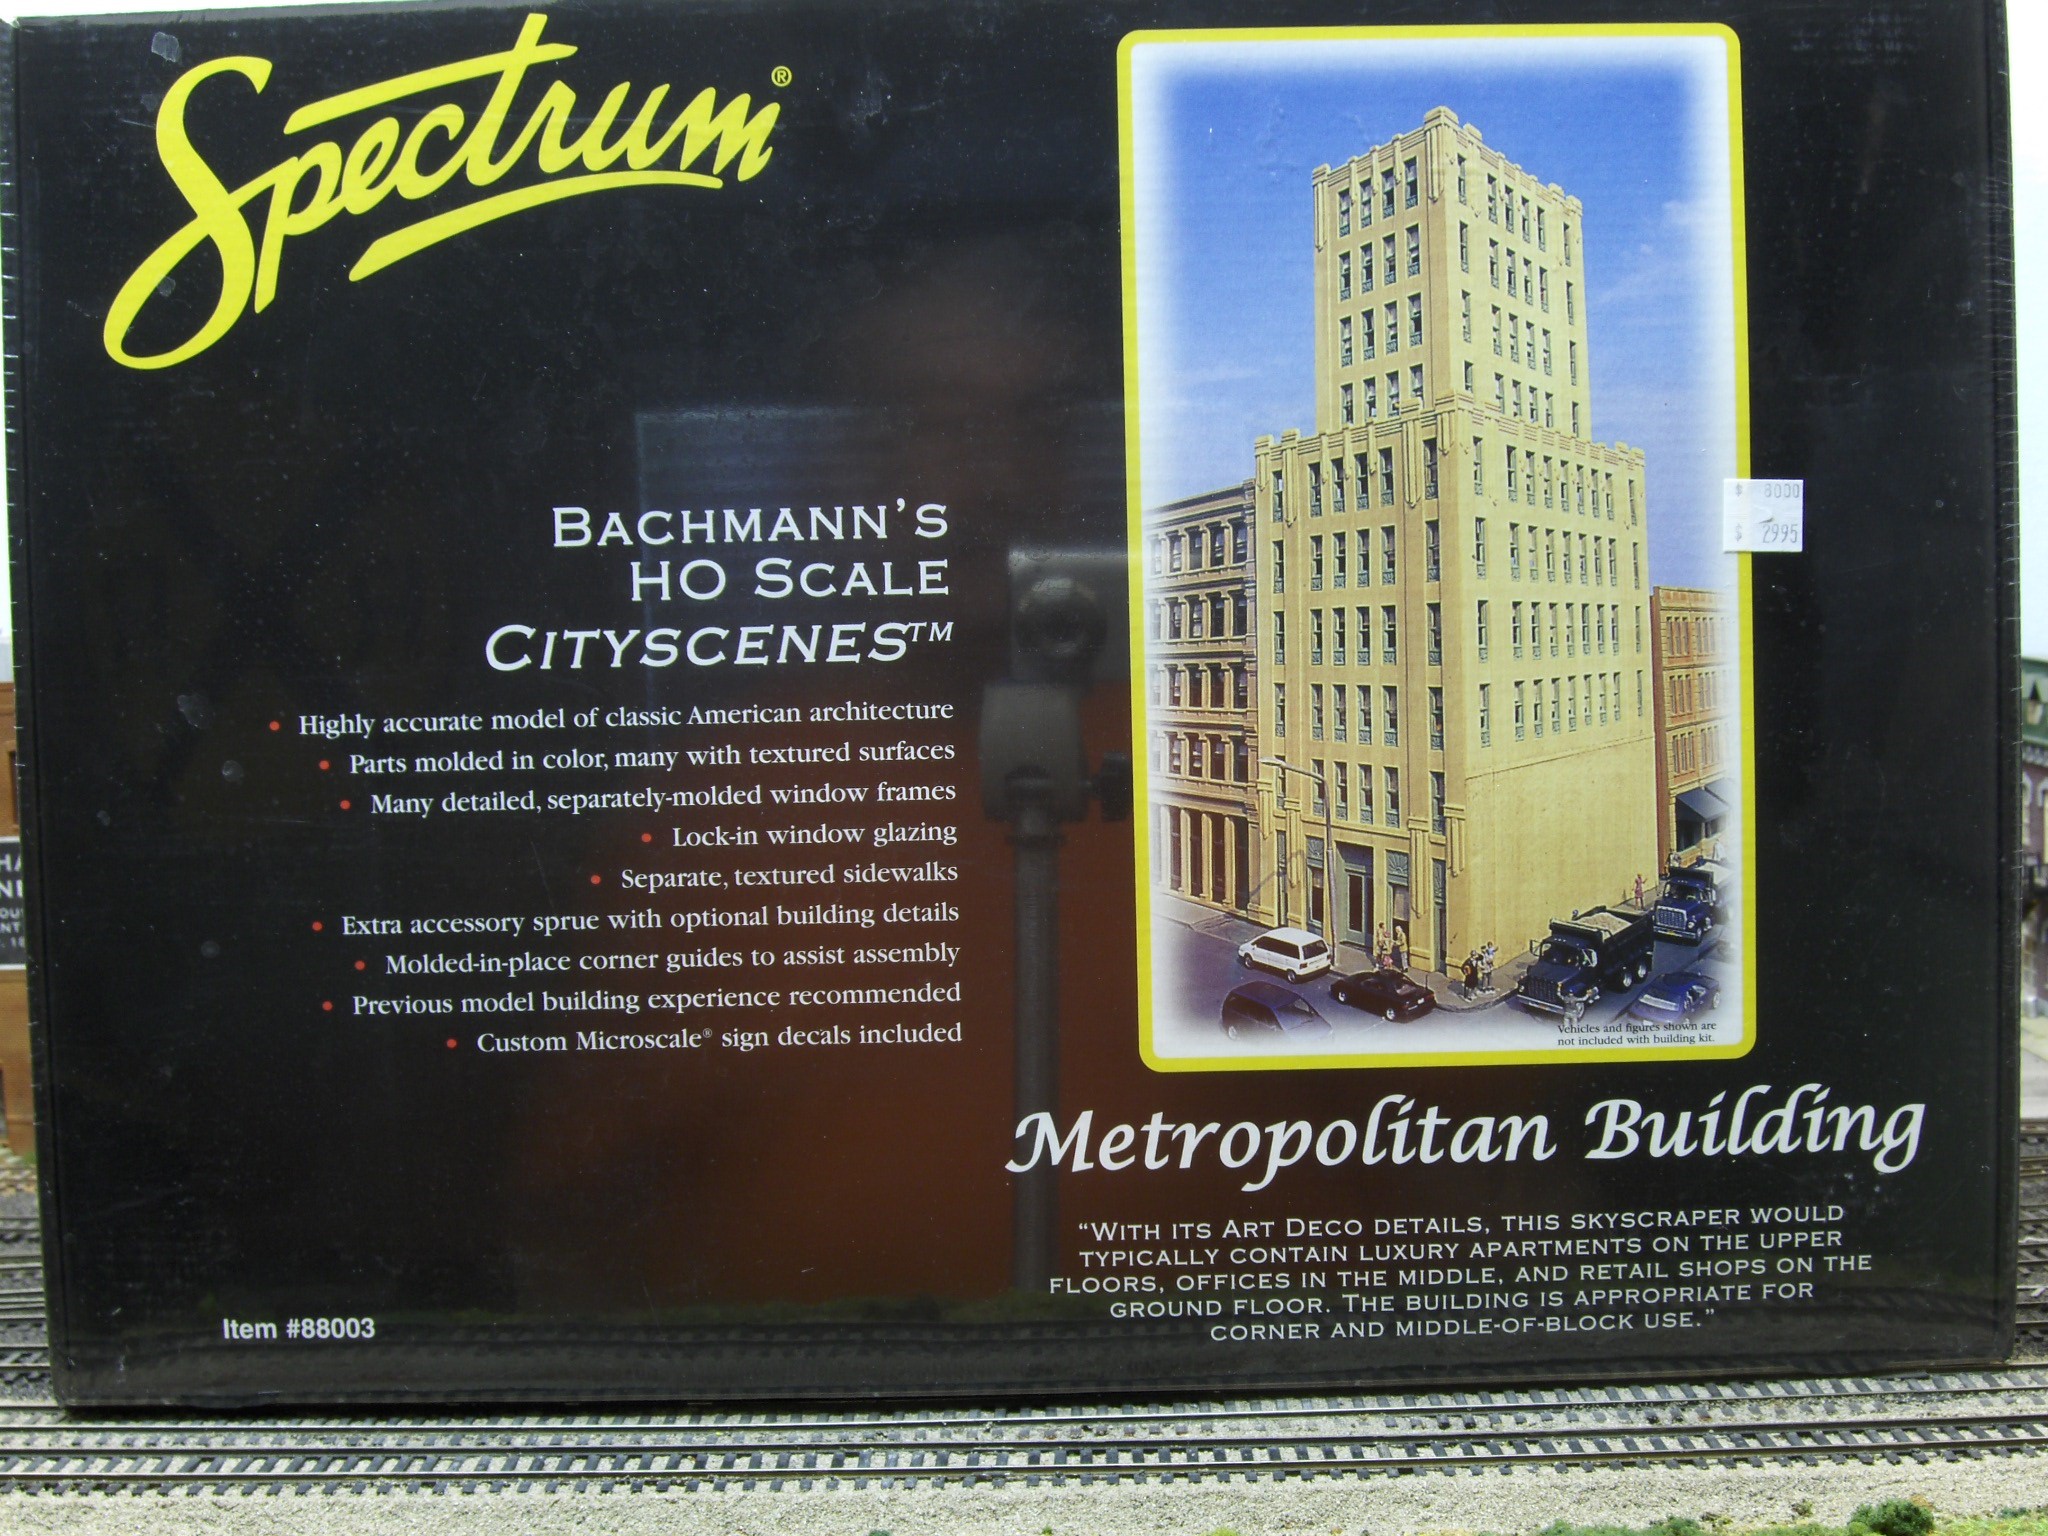
In part one on the new Oakland buildings blog I’ve been working on for my friend Dave, I built the Bachmann Department Store. I made an alley on the side, so we could build the next structure, the Metropolitan Building, next to it. On the other side of the Metropolitan I will add the next structure completely flush to it.
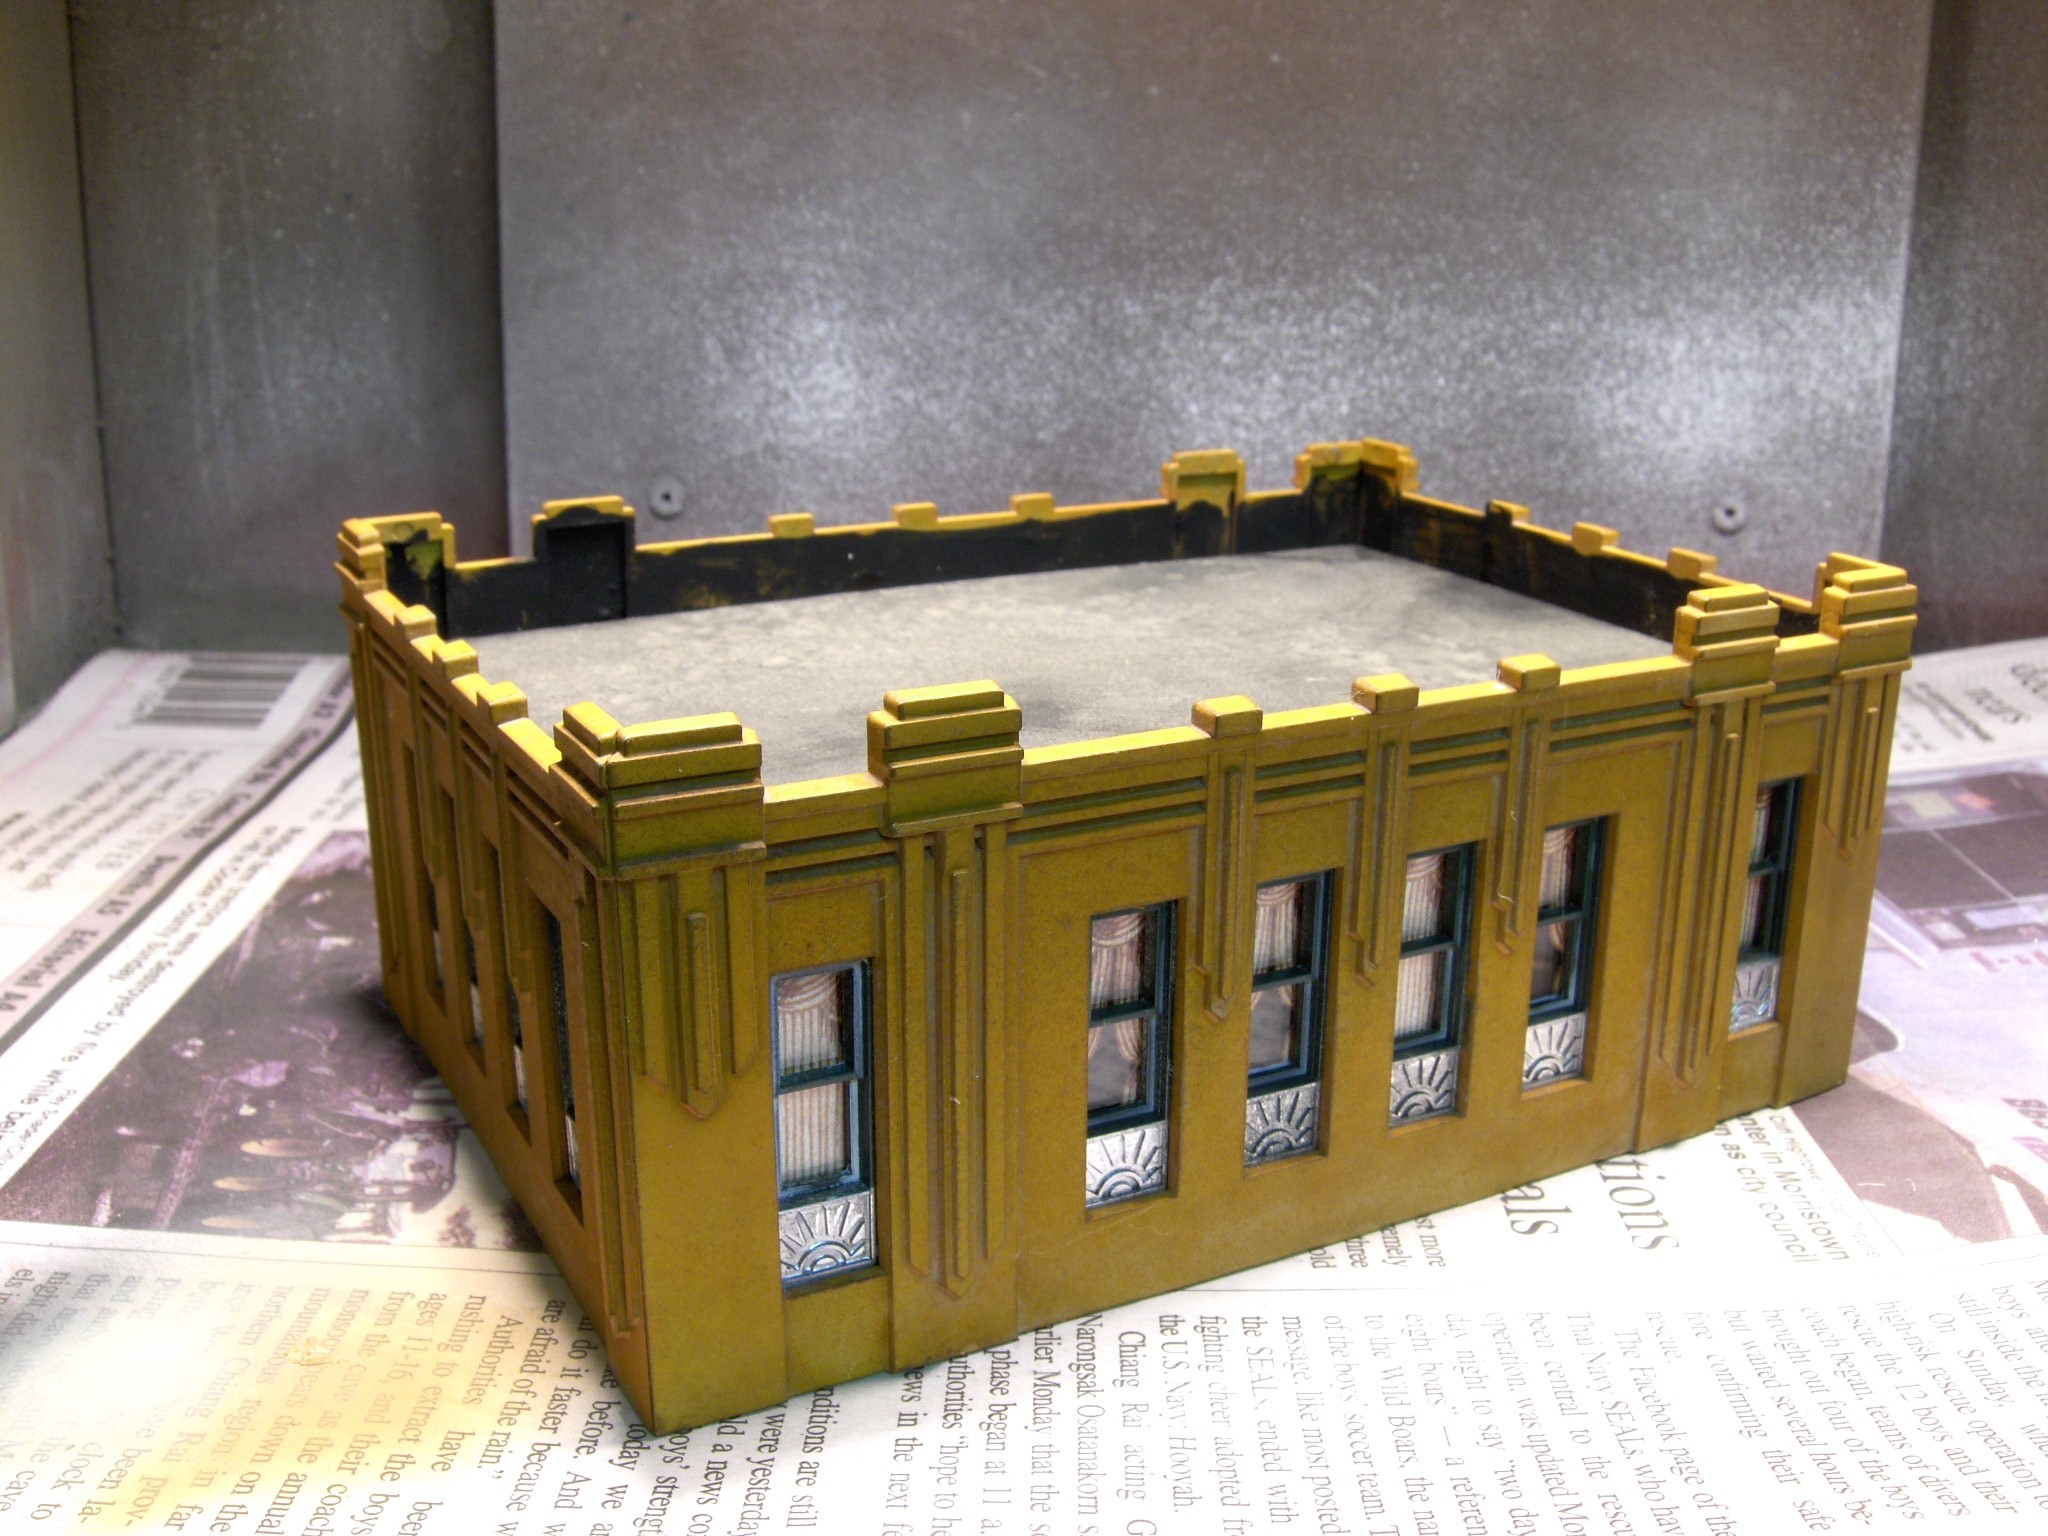
The bulk of the Metro building was built according to the plans, but I did modify the very top structure by making it shorter.
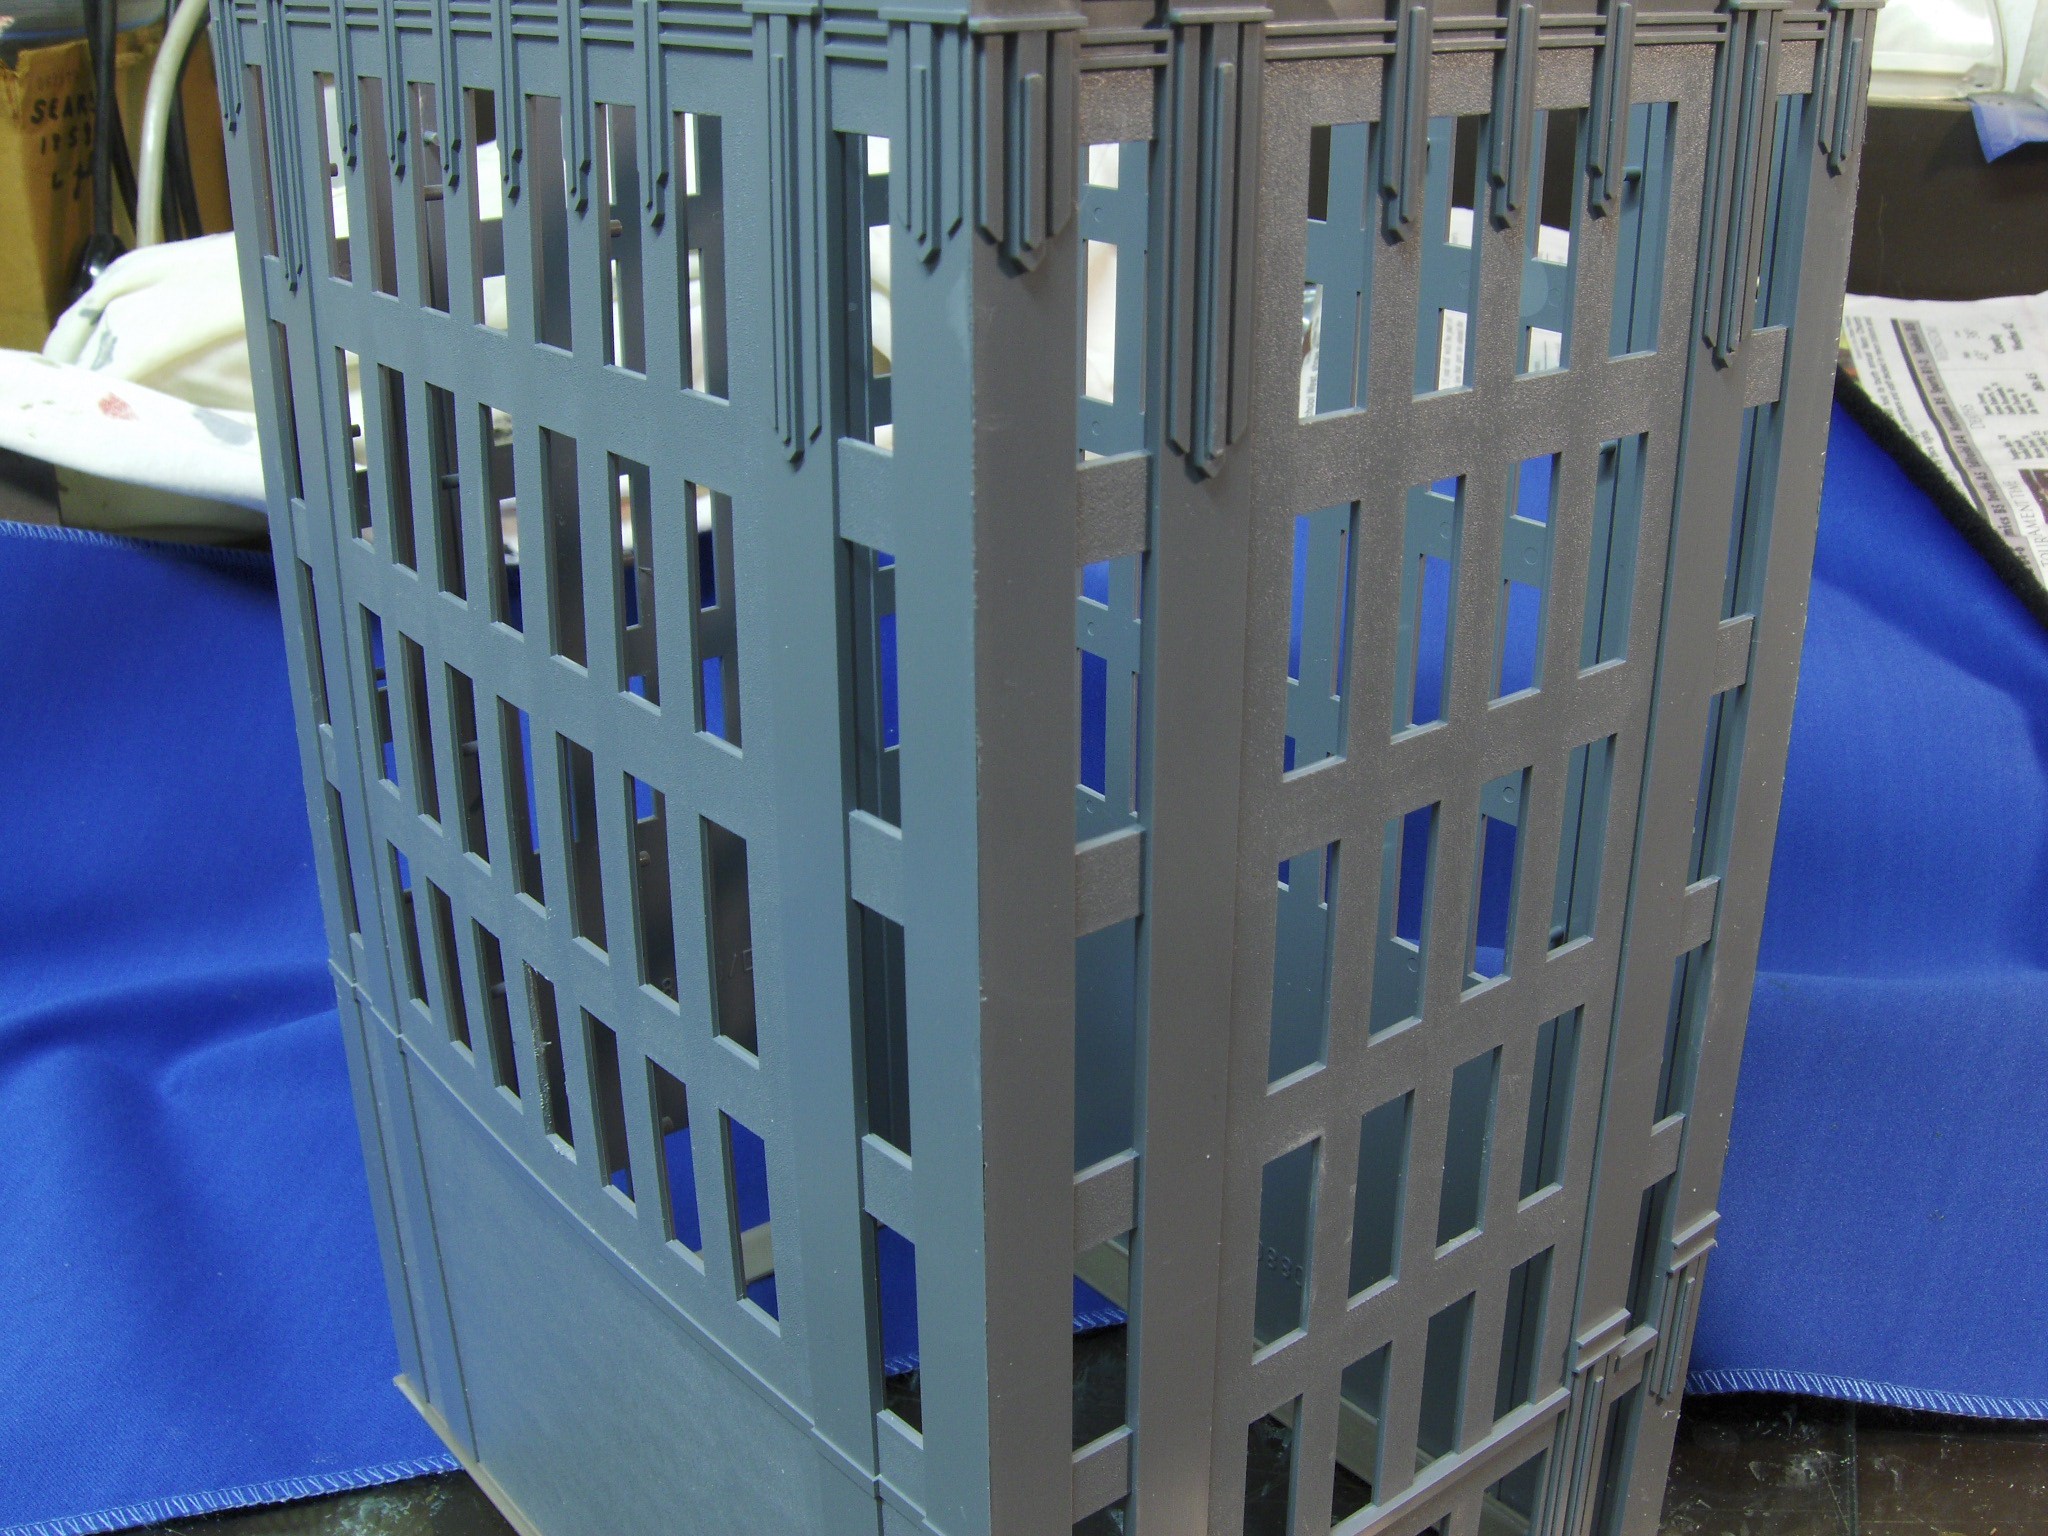
So, I cut off the top of the second section to make this building look different from all the other kits out there. I felt the building would be too tall on Dave’s CD&P because it will be elevated way above the track and surroundings.
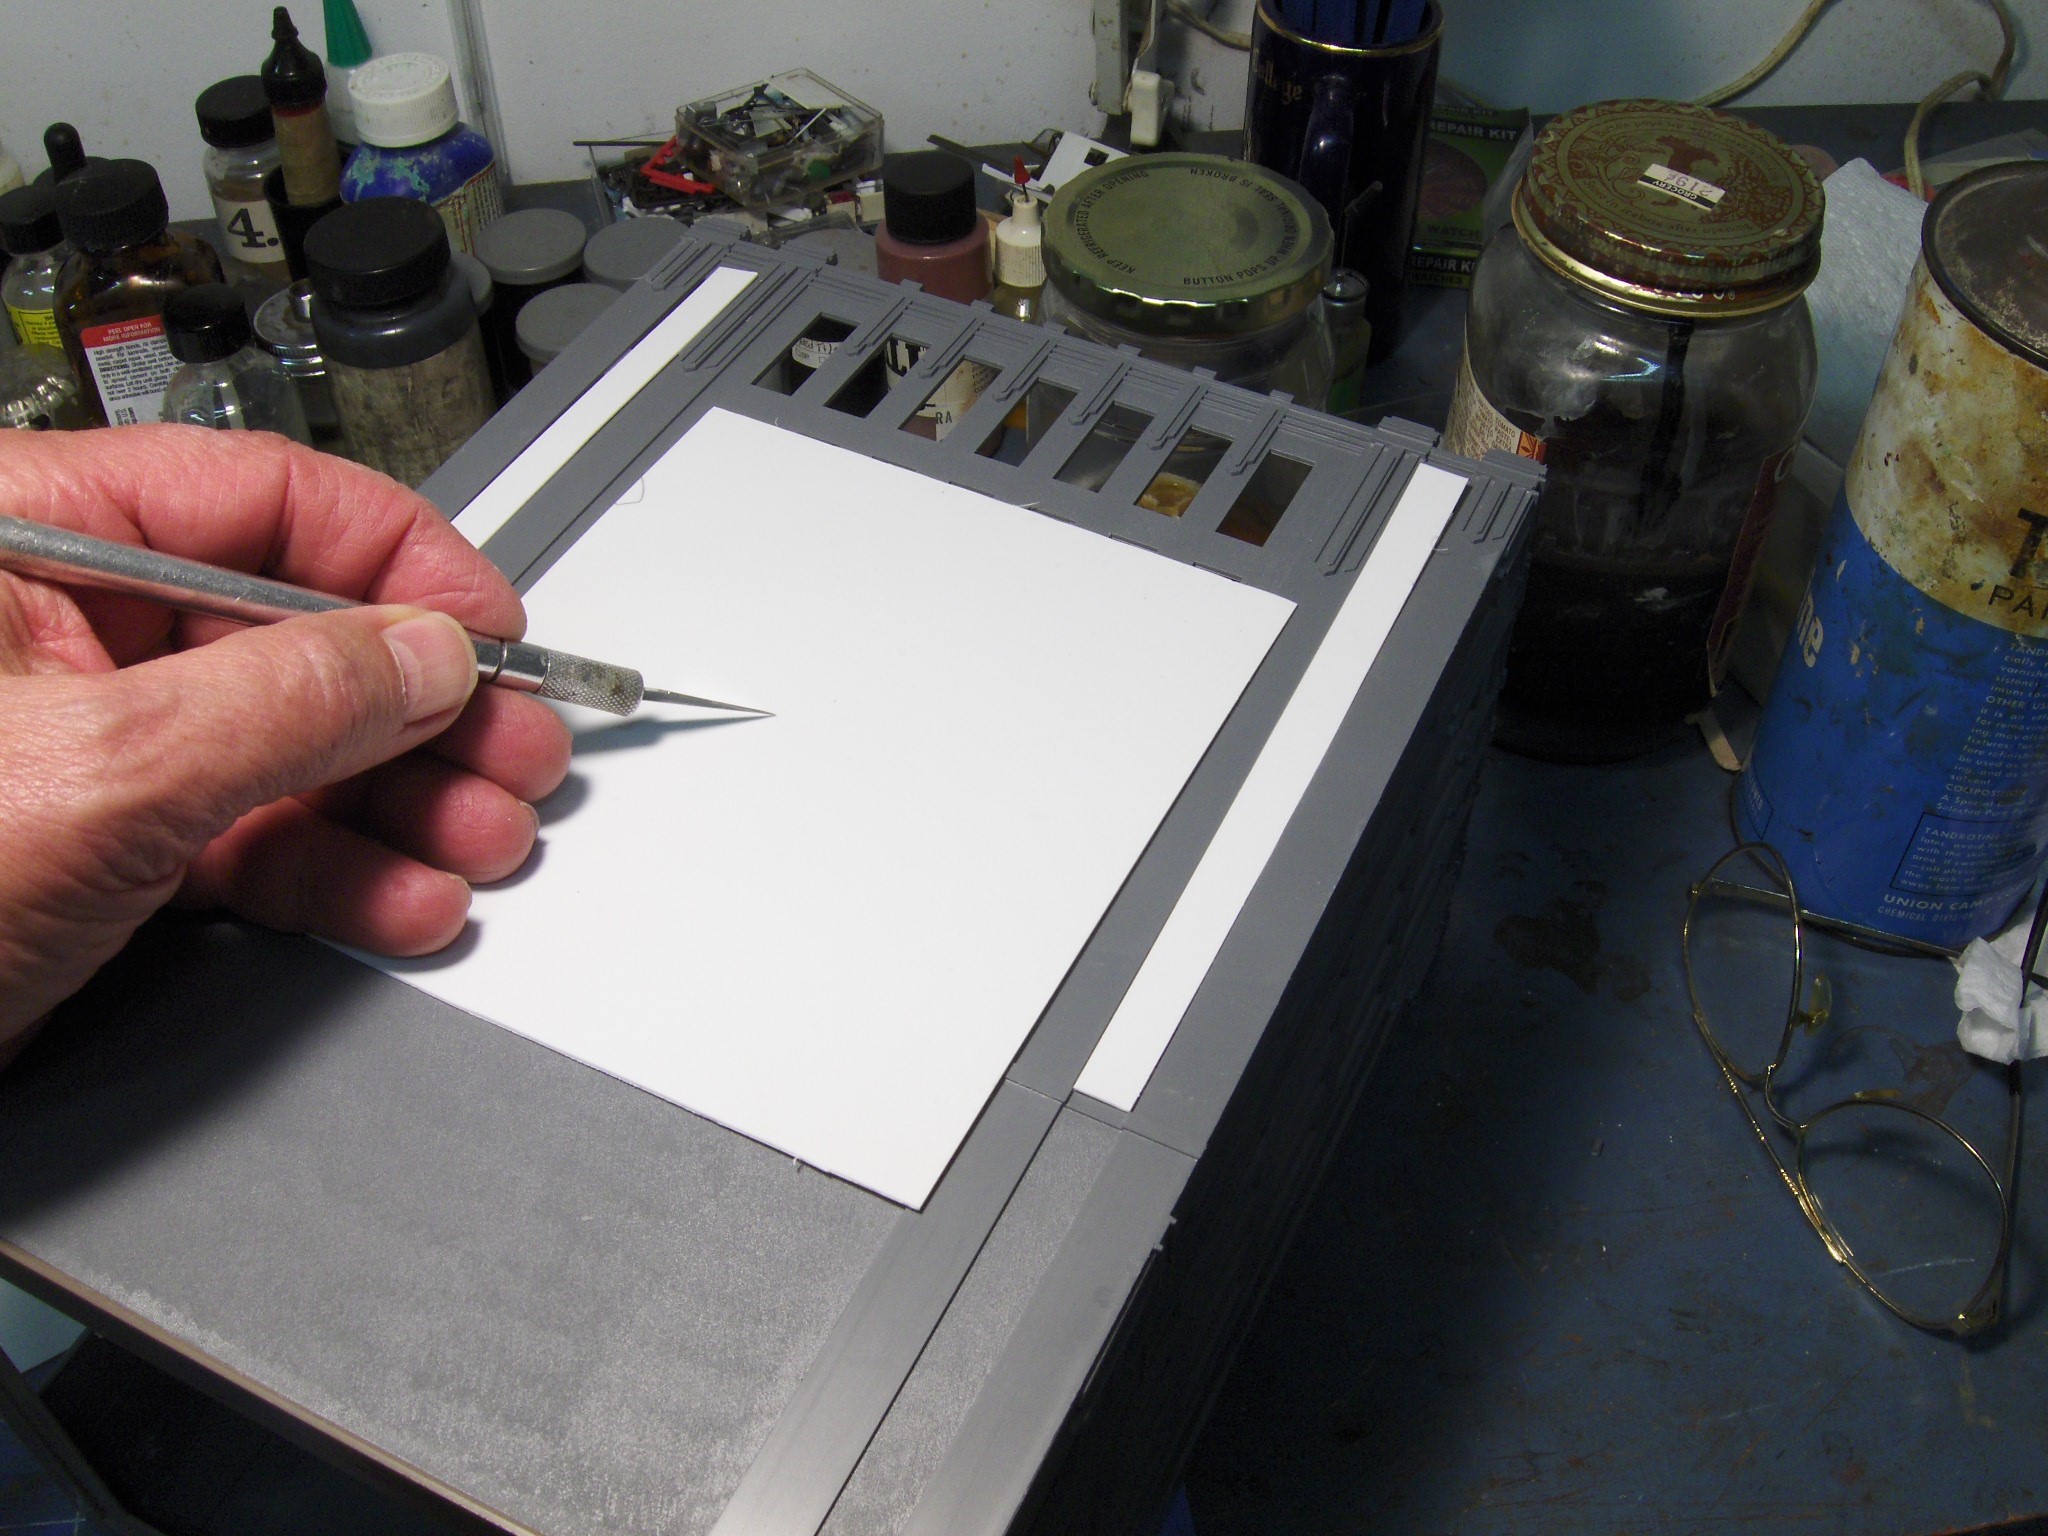
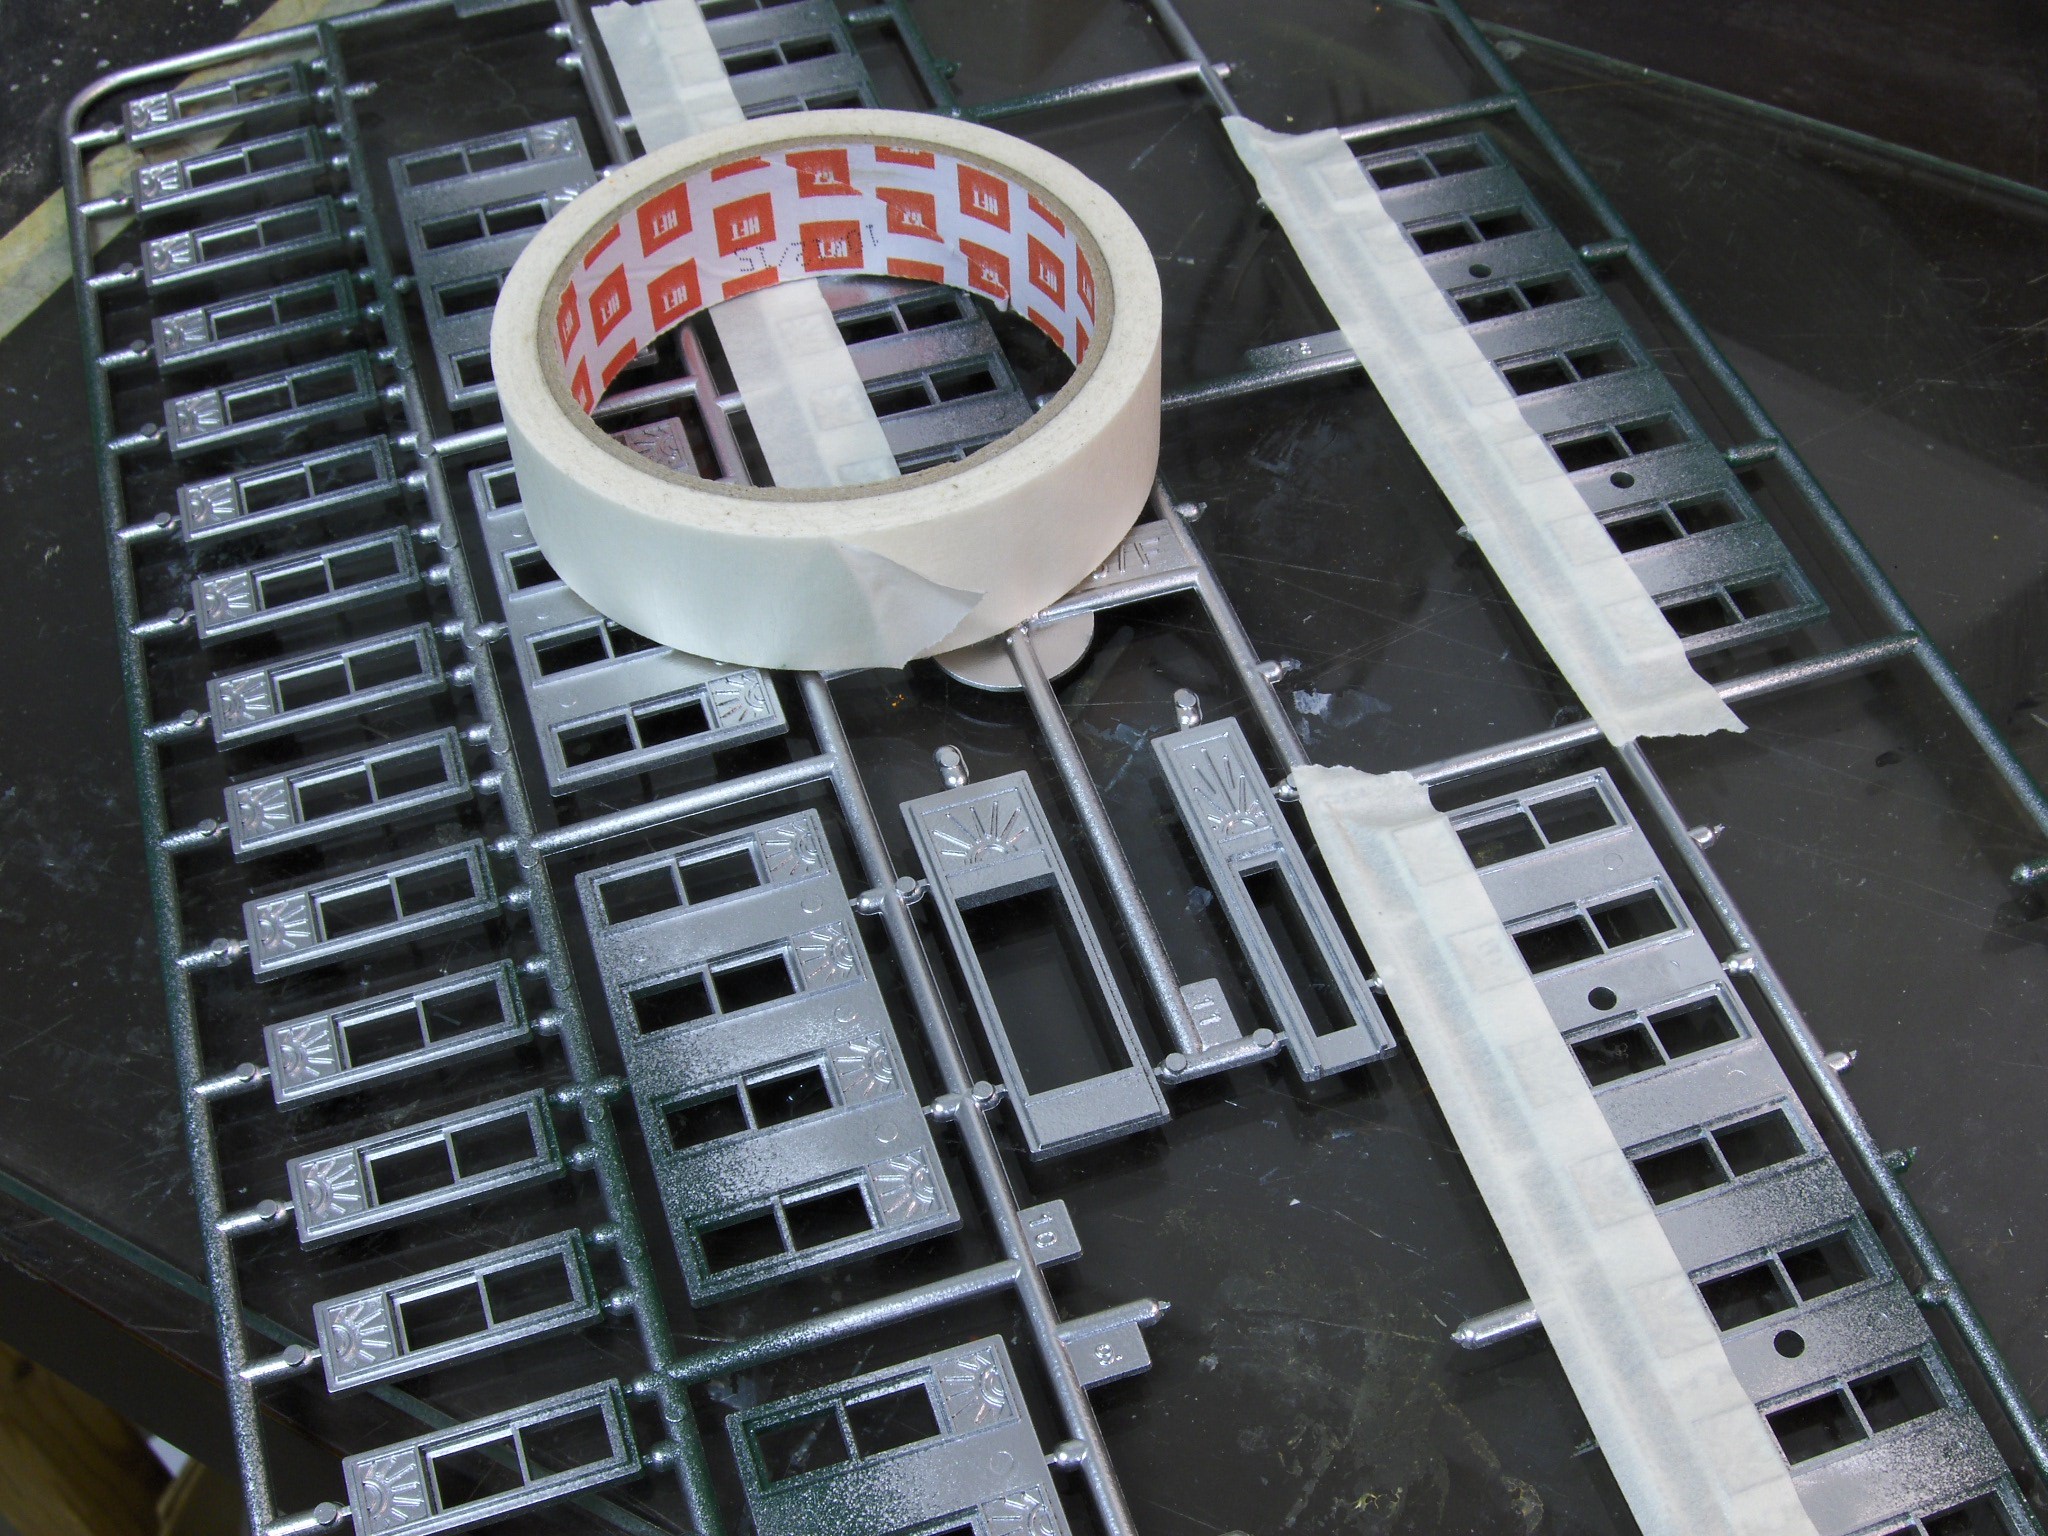
The side that will butt against the third building, the Tower, did not need the windows, so I covered the holes with styrene sheet. The windows at the top will be blanked out from the inside. Before painting, I always wash the plastic parts in warm soapy water to make the paint adhere better.
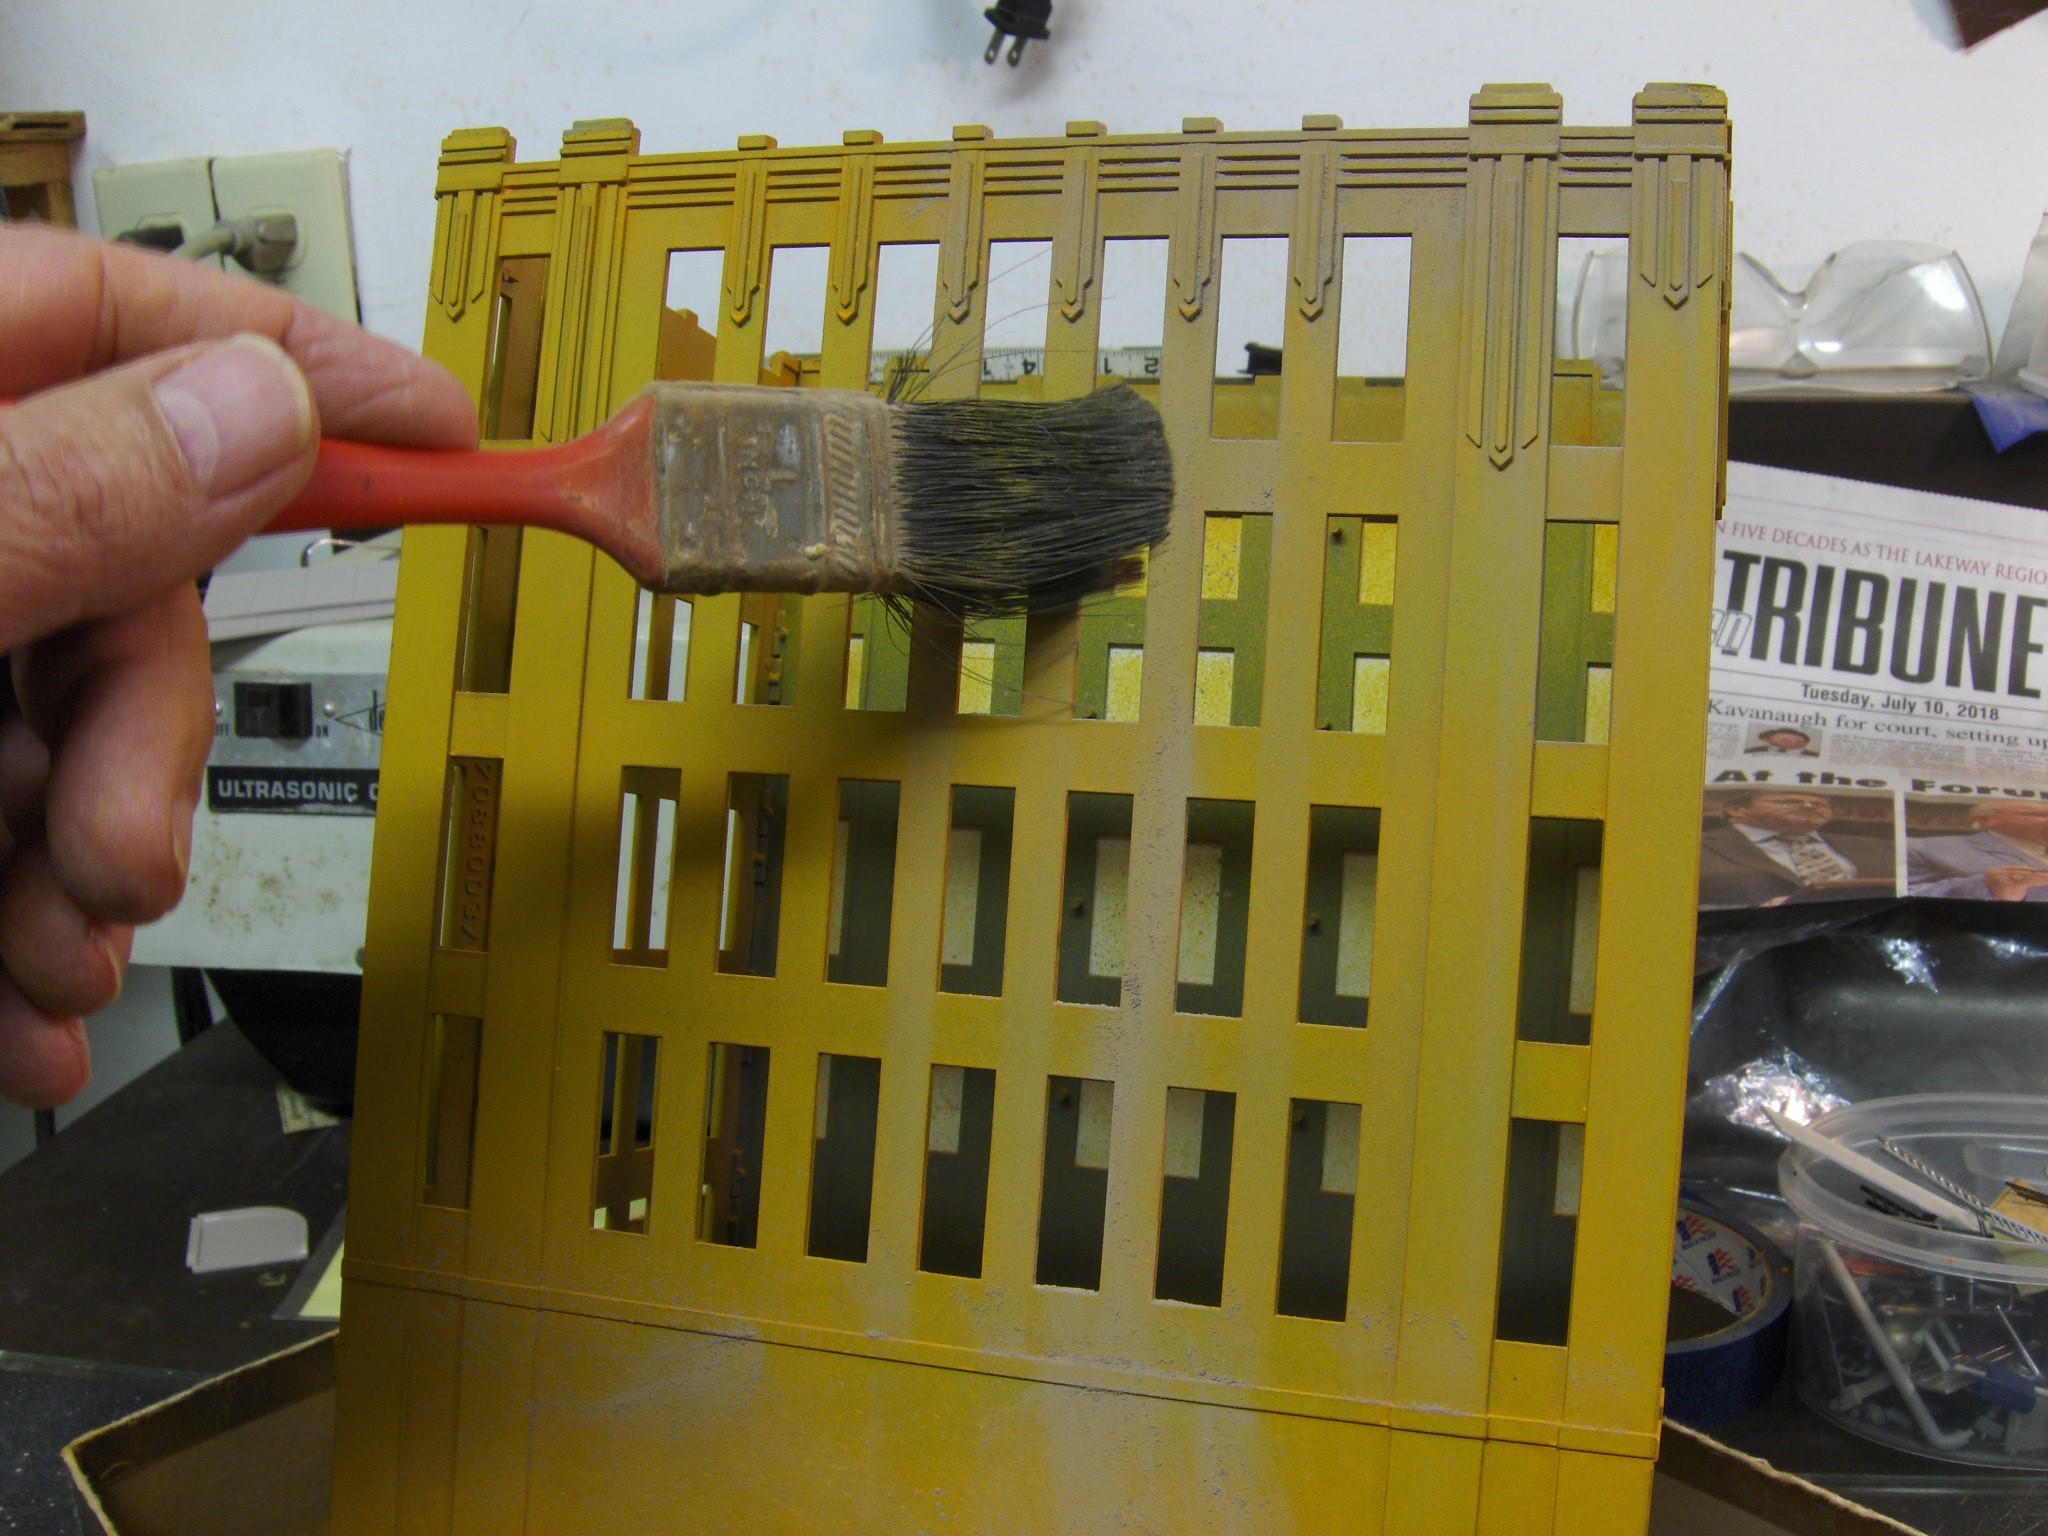
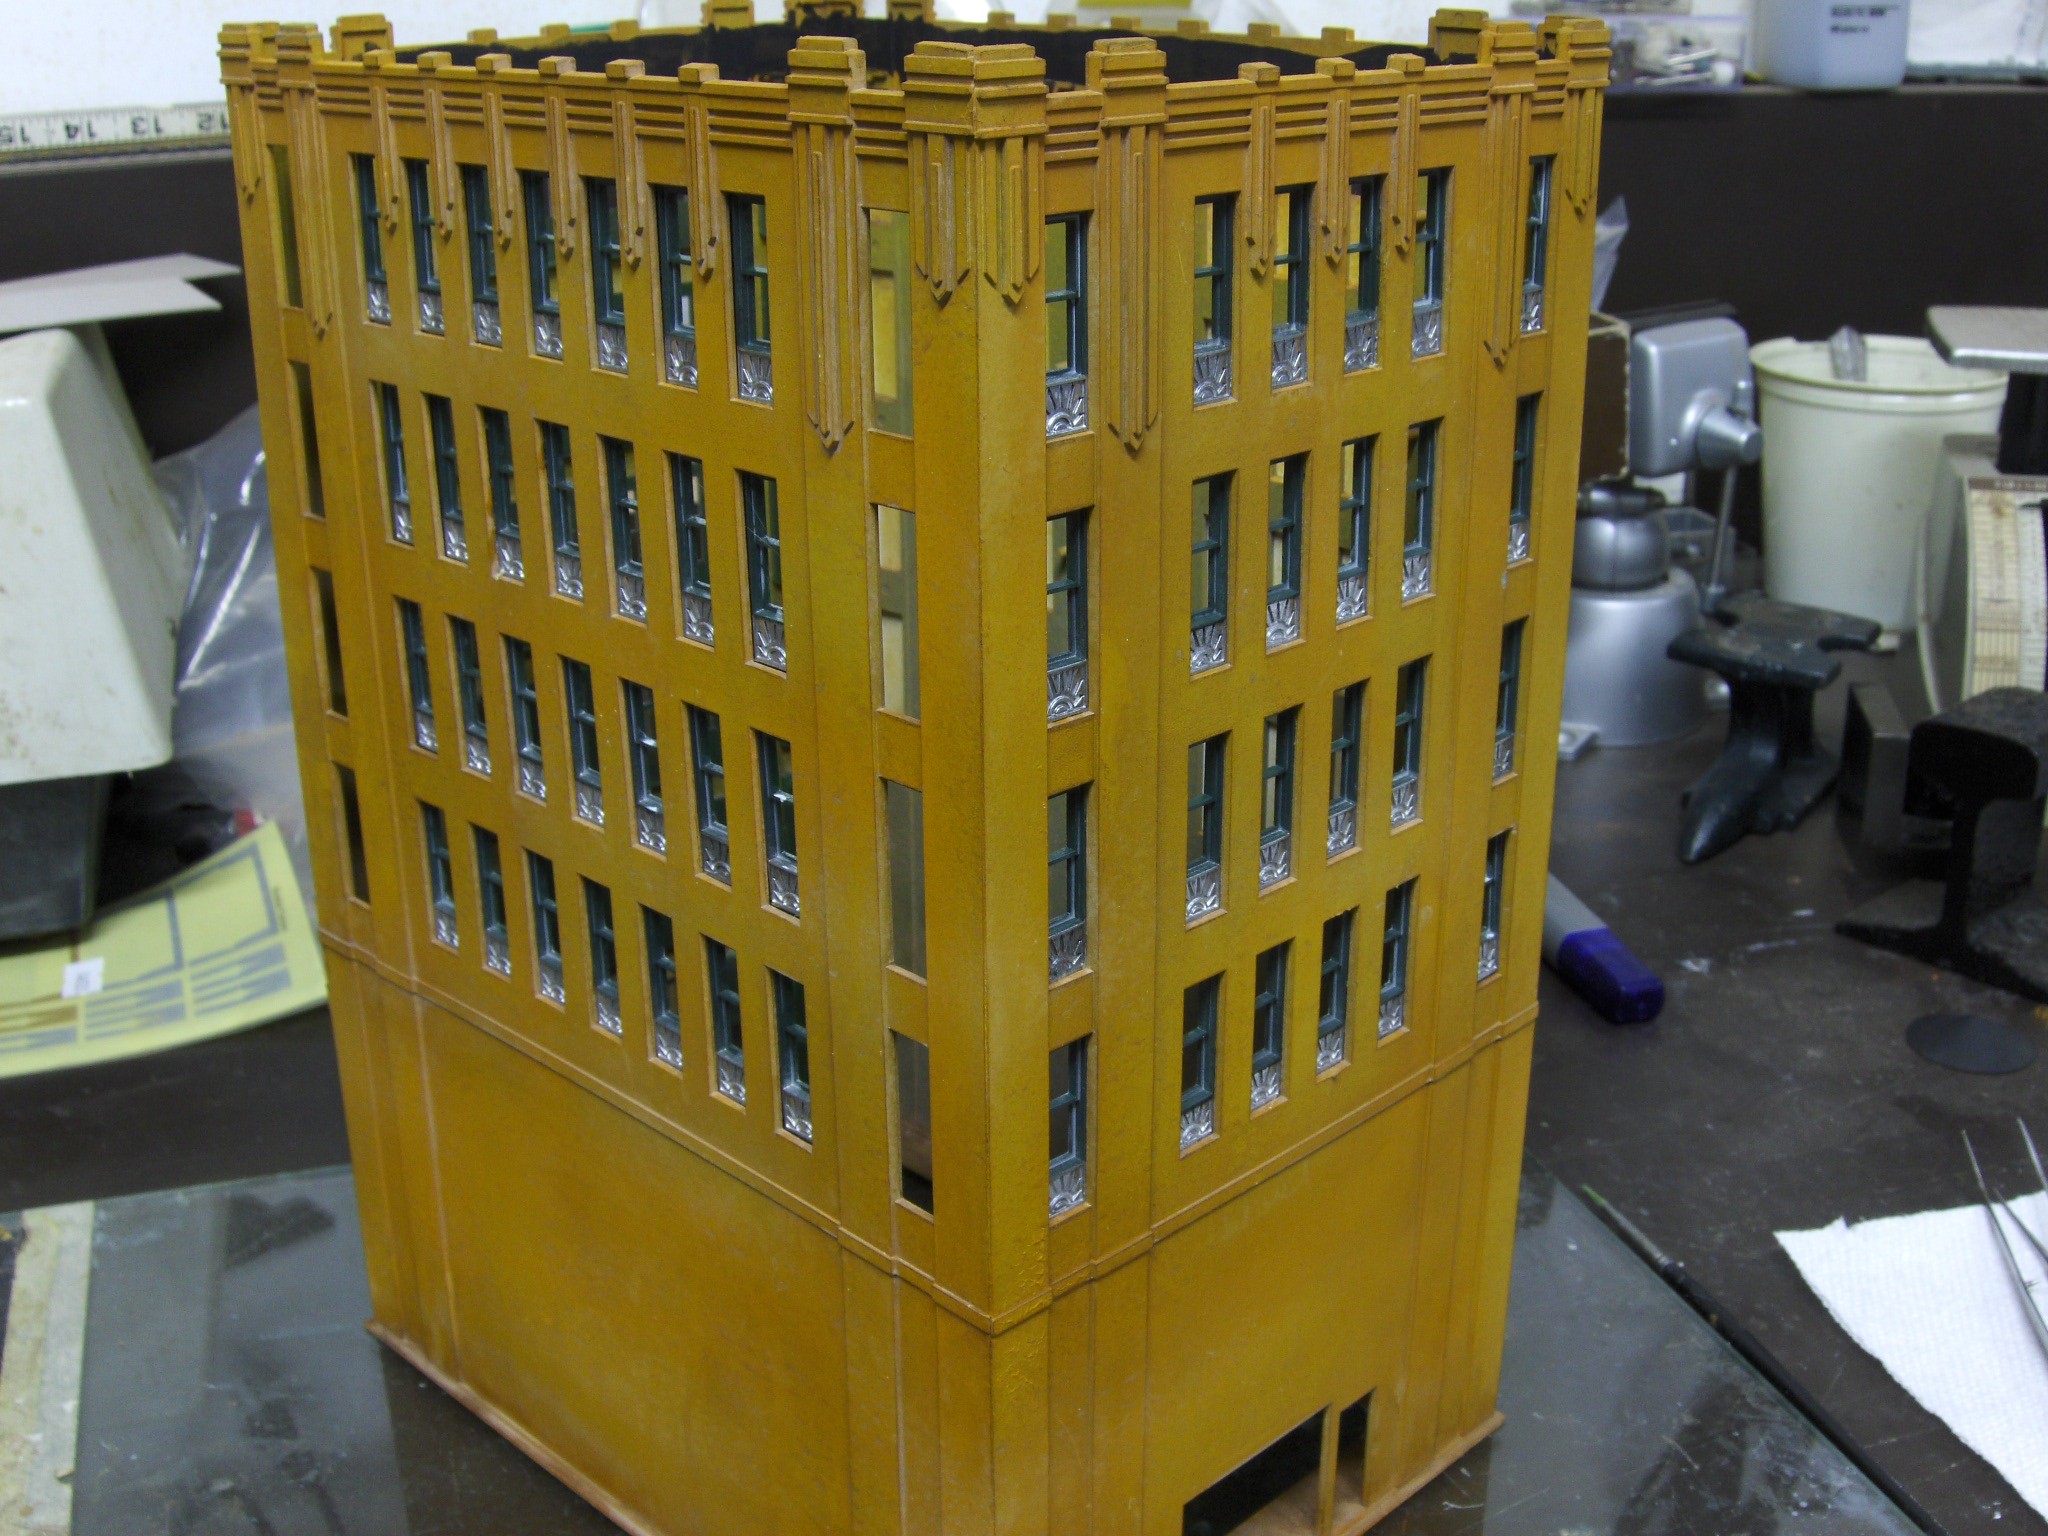
As always, the best way to modify a kit is to paint it another color. Here I’ve sprayed it a yellow orange shade, and then added some powdered orange chalk.
Here I am adding gray chalk and scrubbing it in with a brush followed by a water spray.
The windows have a nice detail below them that appears to duplicate a tin insert. So, I painted the windows a silver color and masked the “tin” lower section off, so I could later spray the rest of the window a green shade.
Here I am peeling off the masking tape after spraying everything green. This gives the building a nice touch that will make the windows “pop out.”
Here is the top section after the windows and window dressings have been added.
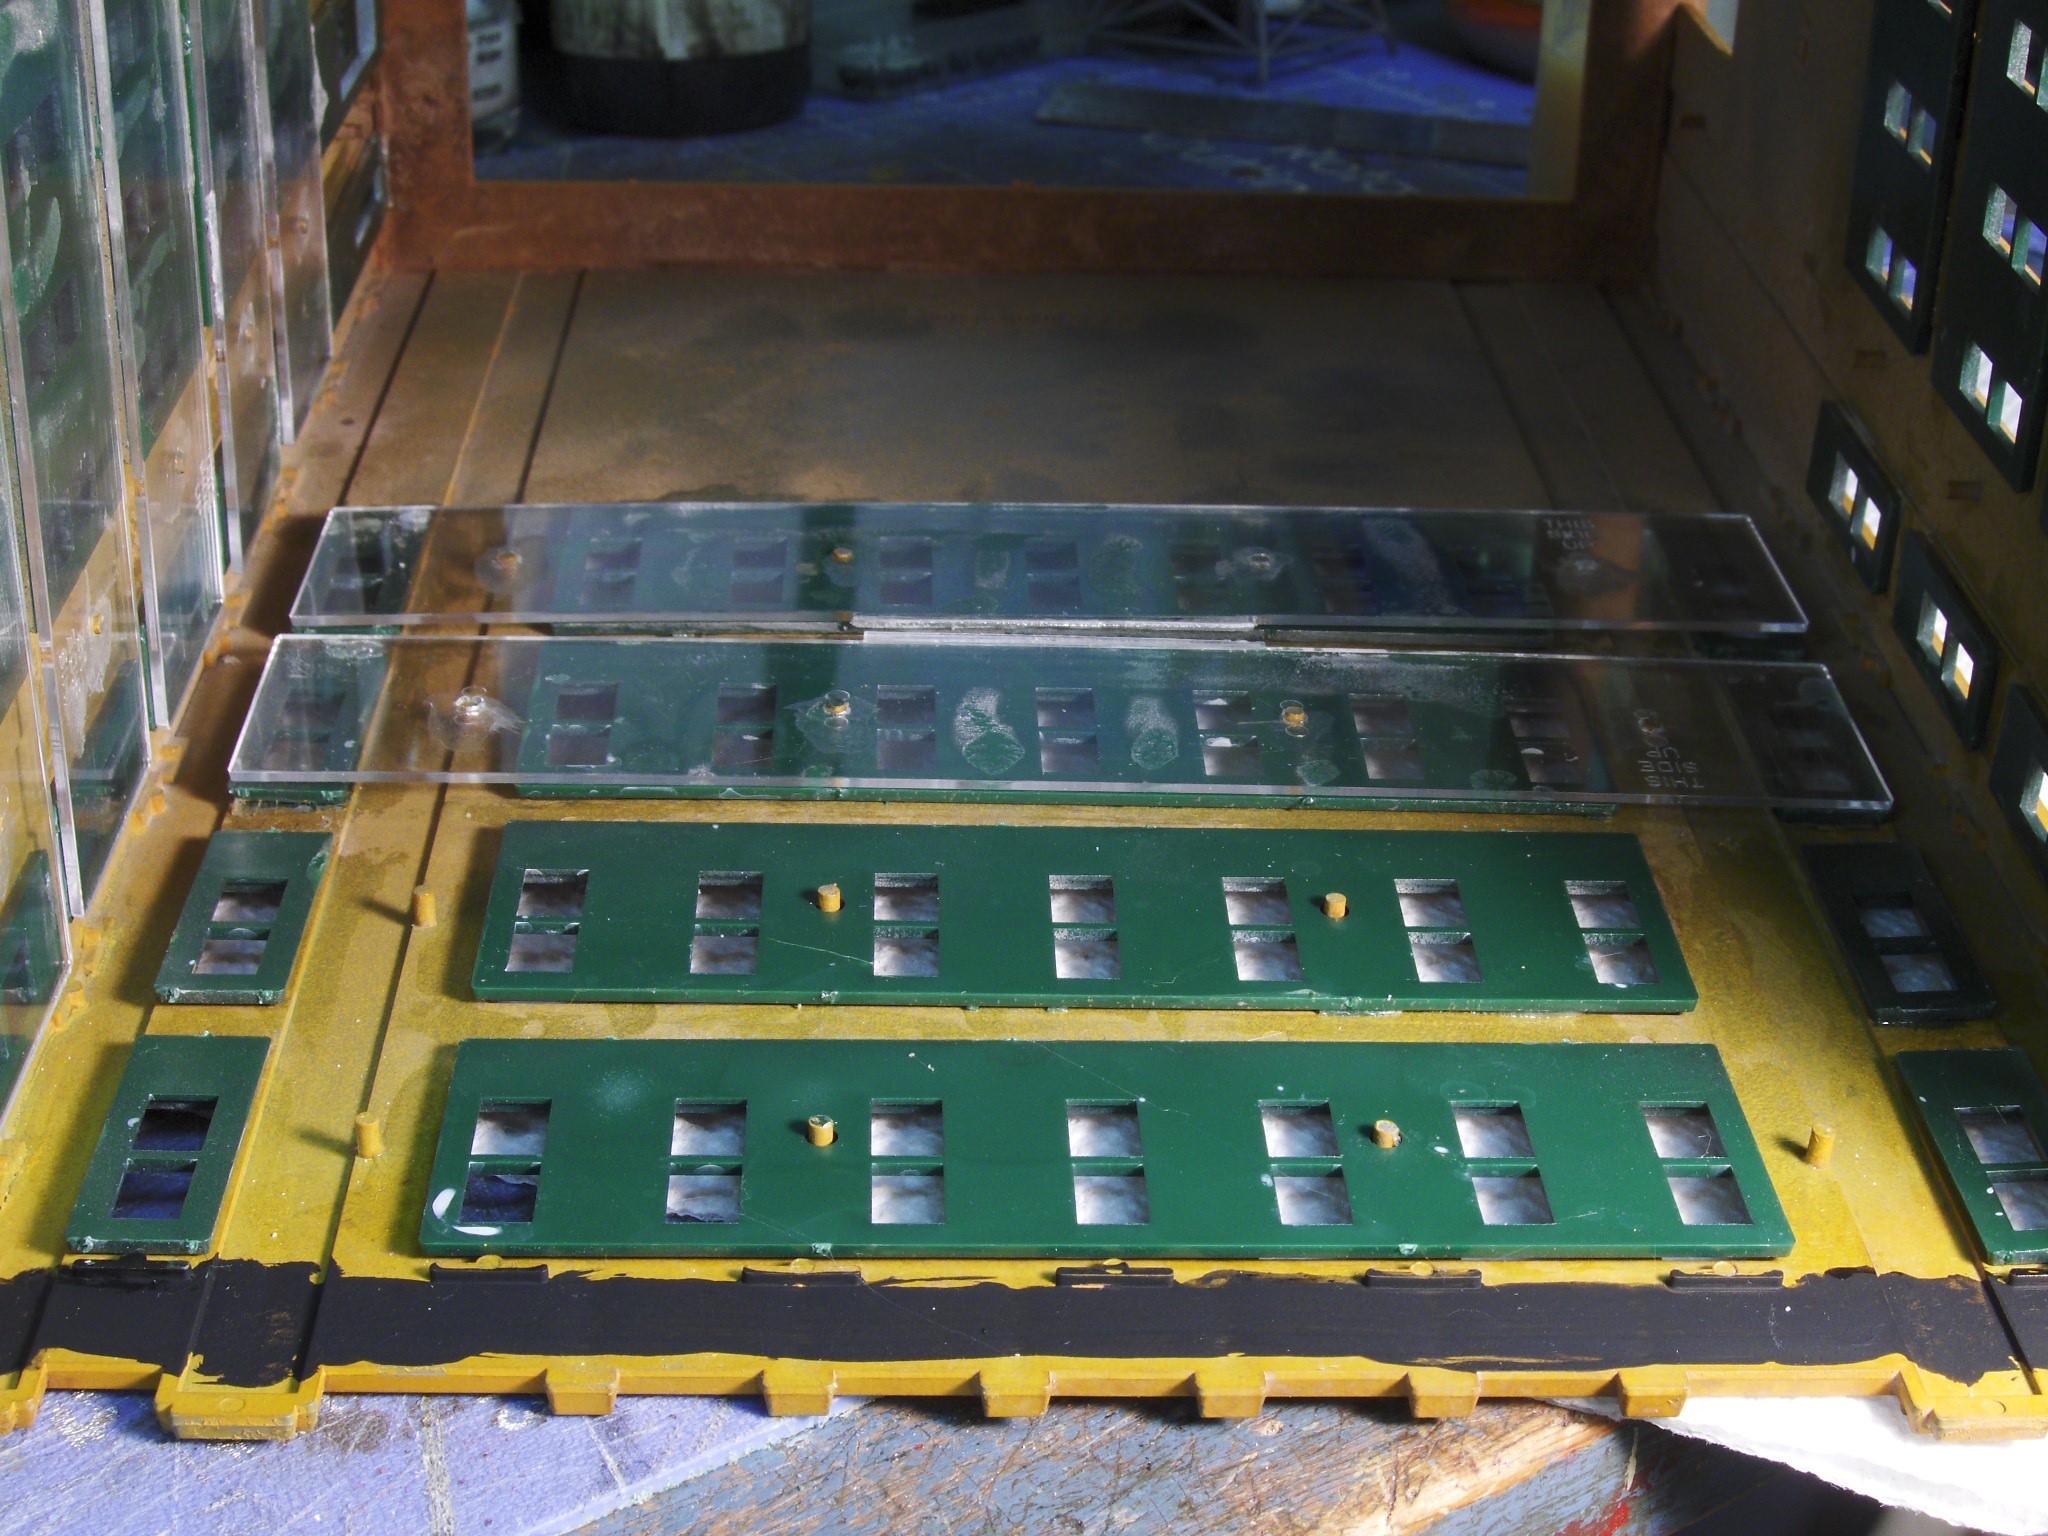
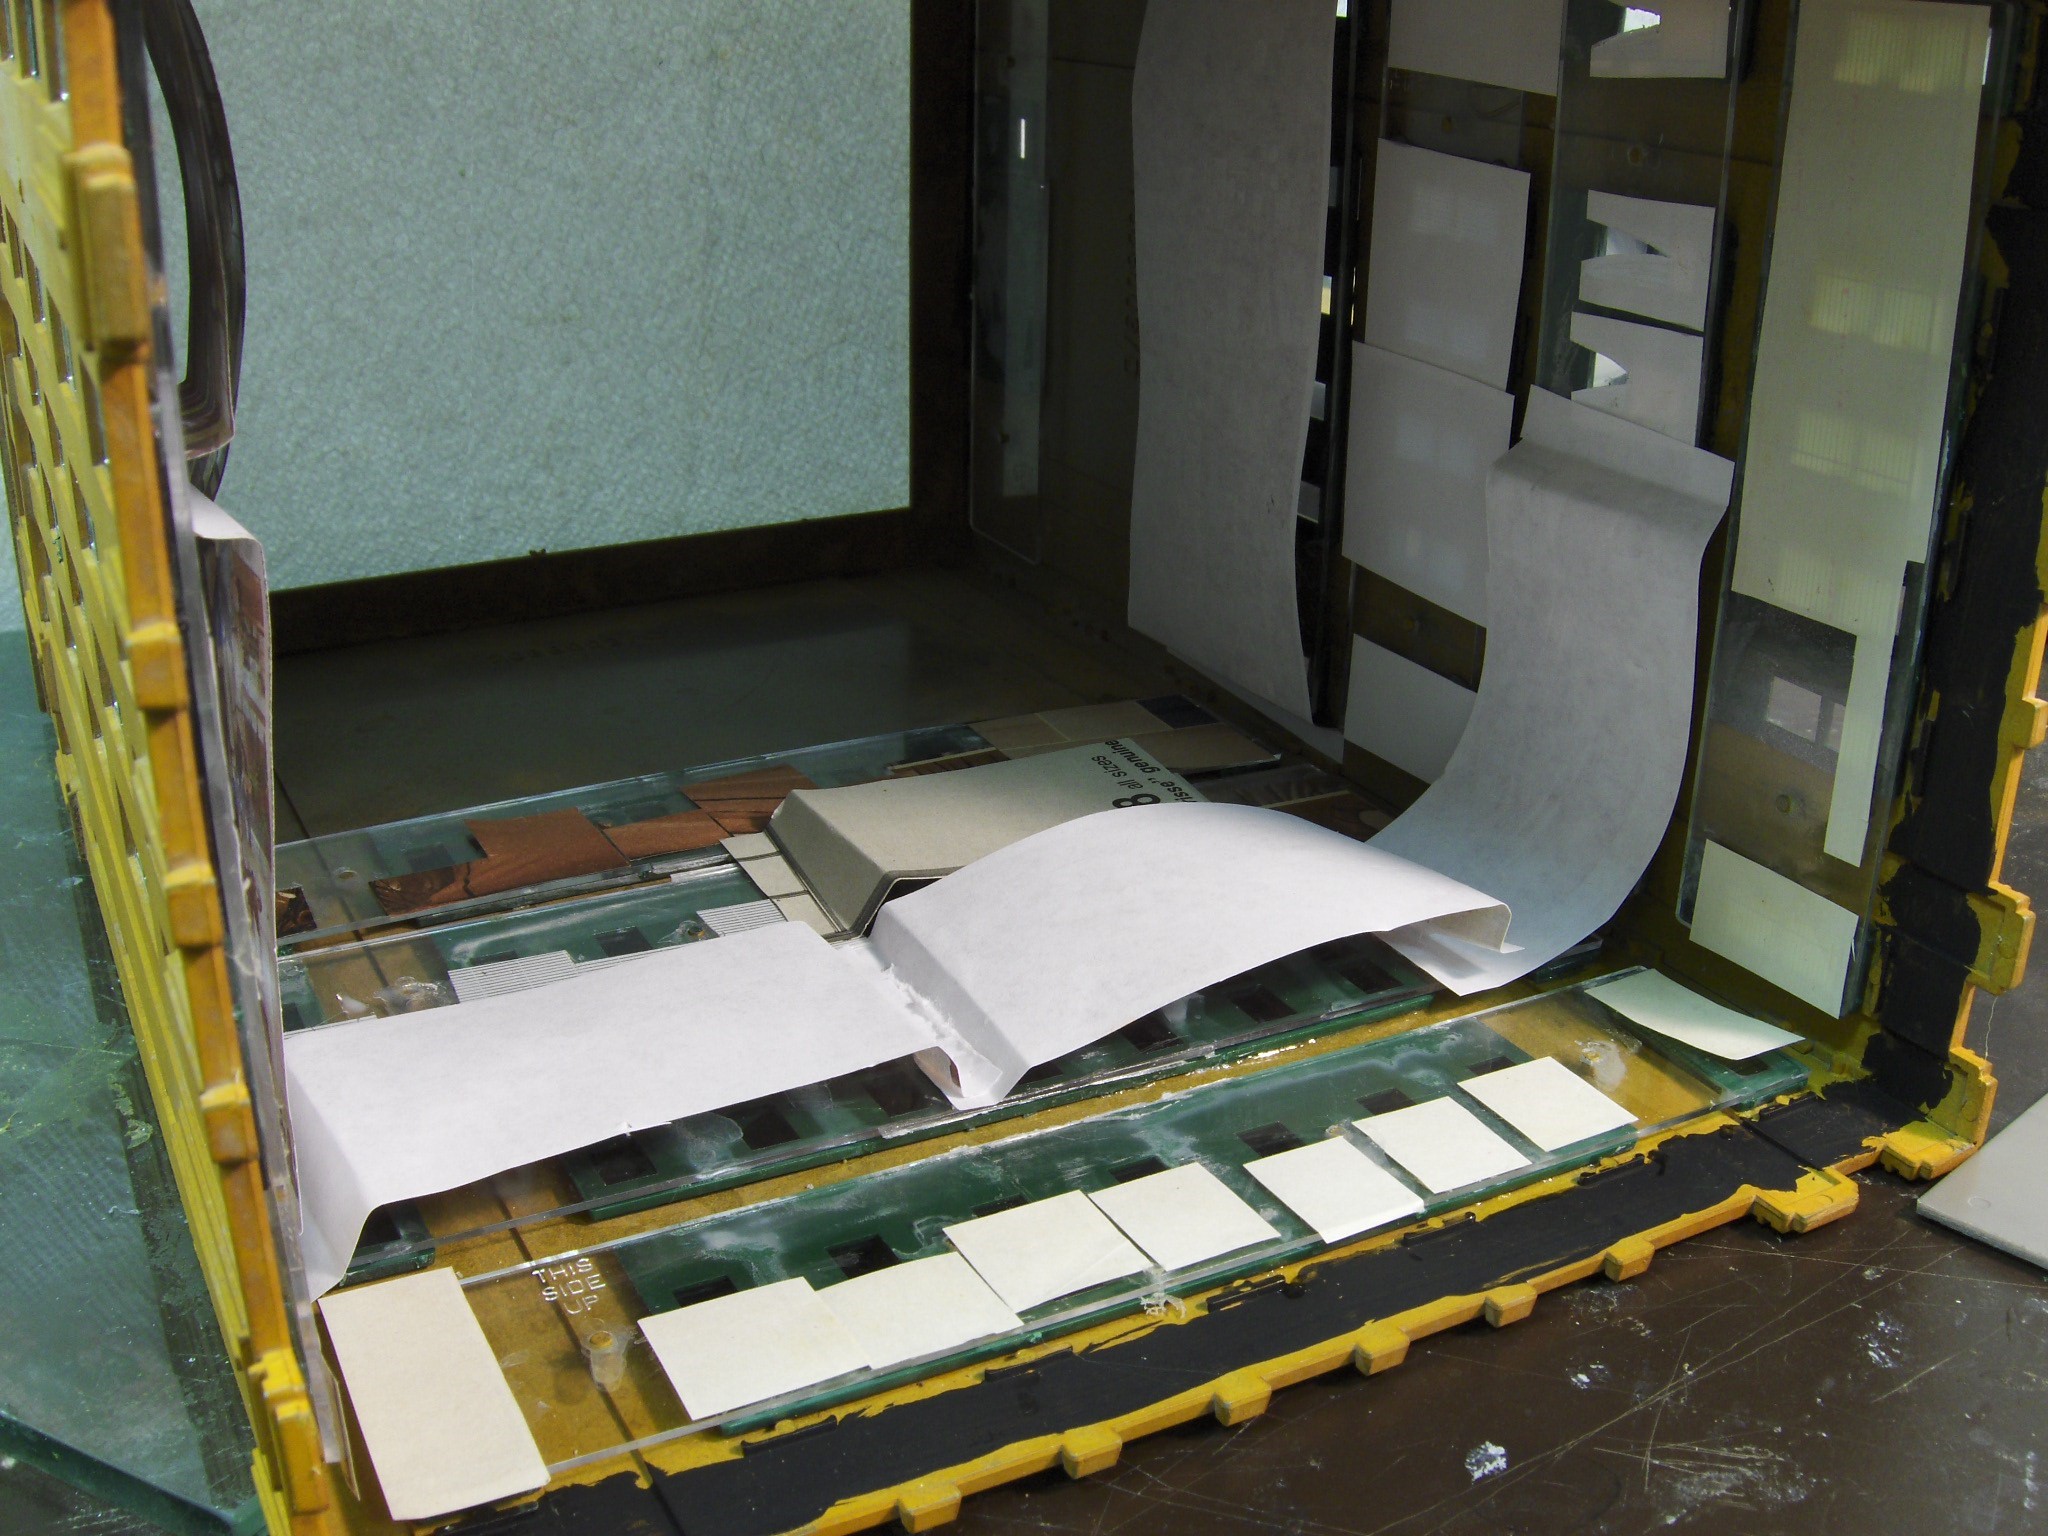
On the main structure I glued the windows and plastic “glass” from the kit in place. At the top, I added some acrylic black to help hide the lack of detail near the roof of the building.
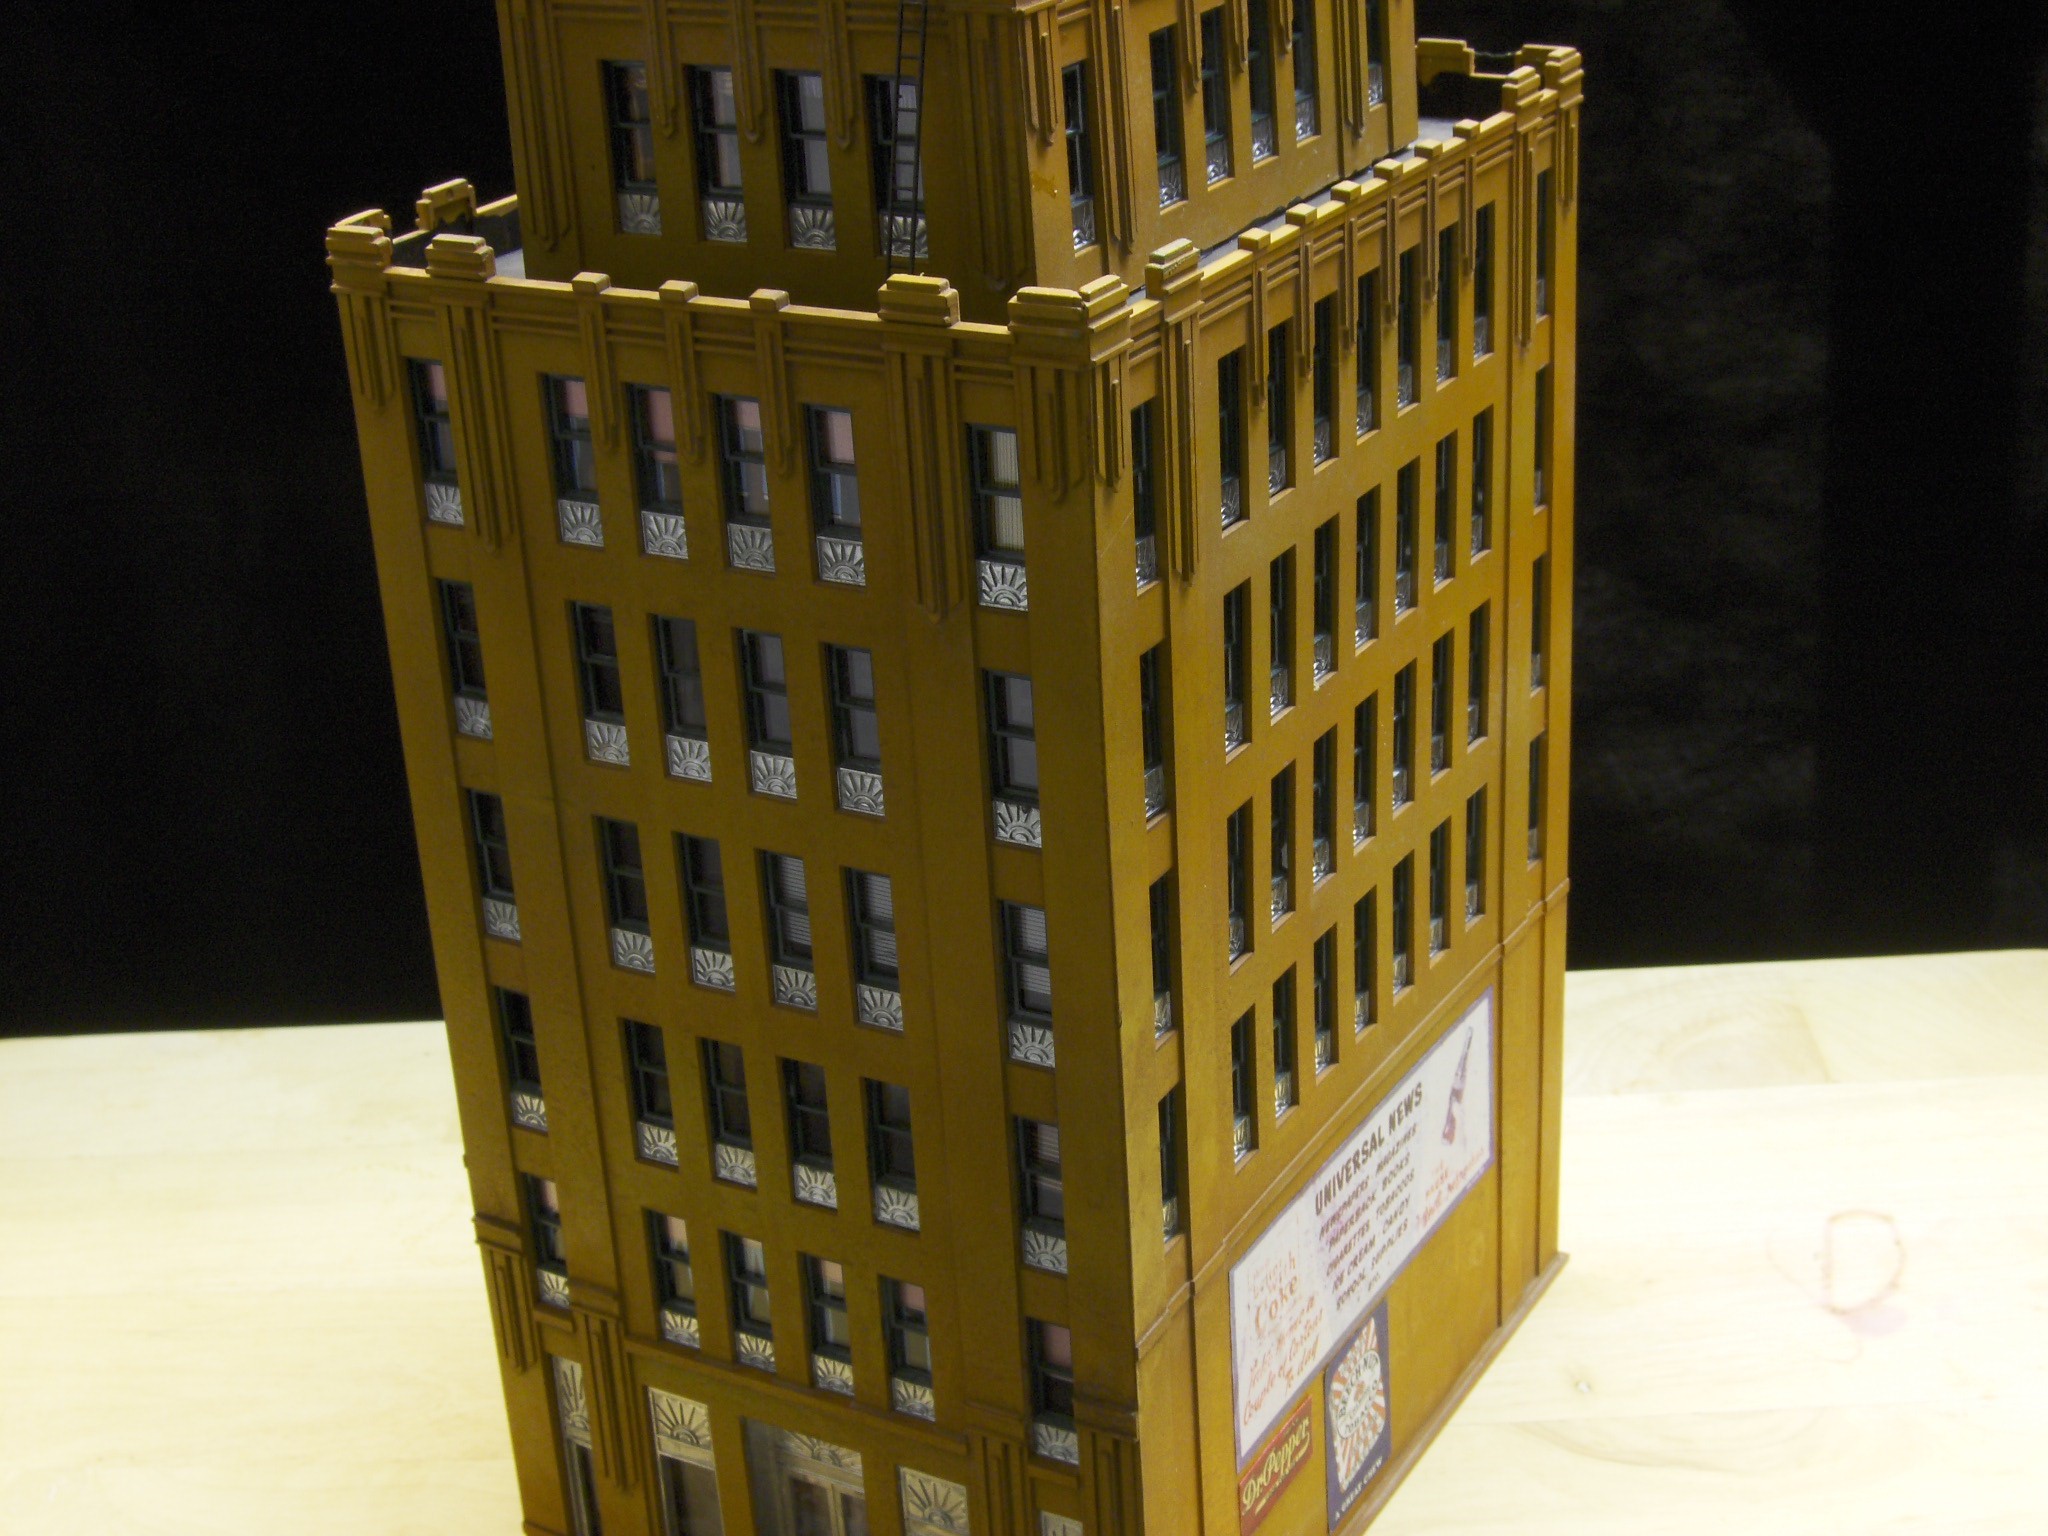
Next it was time to glue in the shades and printed pieces that make the building look occupied. This time I used some full color pictures from supplement ads in the newspaper. It doesn’t matter too much what these pictures are, as long as they look like something when seen from the exterior.
This shot shows you what the various shading does to the finished building. There are dark shadows under the details that make them stand out, and the bulk of the walls show a variety of shades just like a real building would have.
On the right side, I added some signs that will grace the planned alley next to the department store that I made in the last part. This also shows the added abbreviated upper section instead of the original 4-story upper section.
This is the view of the front with all the “apparent” interior detail added. There are window shades, venetian blinds, and nondescript details from ads. There are also some pictures of offices that I found on the internet. Now we have another building that doesn’t look like the original kit box art on the right.
Want to read part 1 of this article? Click here!
Share tips, start a discussion or ask one of our experts or other students a question.
8 Responses to “Building a Block for Oakland Part 2”
Steve Ruple
That was very awesome. Thank you for all of the ideas that you can do for reconstructing a building Again thank you for sharing the ideas... Keep them coming !!!!!
Mr Daryl J. Smith
Very nice, I like what you did with the windows, that silver paint on the bottom looks great
Dirk P Reynolds
Again,,,,,,,,,,,,,,,,JUST WOW!!
Gerald Brayne
i AM LOOKING FOR THE SERIES OF BUILDING TAT YOU CAN PURCHASE AND DOWNLOAD THE PLANS
Alan DelGaudio
Very nice brief article. I've built the Metropolitan Bldg cutting the windows for an N-scale look.
resmithcmfge
Bridge building video
Roger Mercier
Nicely done!
PAUL E
looks good, nice finishing touches.
Get New Lessons & Special Offers
Sign Up For The Model Railroad Academy Newsletter
Get Access
Premium Membership
Unlock exclusive member content from our industry experts.
24/7 Access to Premium Model Railroading Videos, Projects, and Tips
Step-by-Step Instructional Guides & Layout Plans
50% Off Video Downloads Purchased in the Model Railroad Academy Shop
Get exclusive premium content! Sign up for a membership now!
This site uses cookies and other technologies to track your use of the site that will allow us and our service providers and partners to enhance your experience and deliver relevant content to you. By agreeing to or closing this notice, you understand and agree to such use and data collection. For more information about our privacy practices and your choices, please visit our privacy policy and cookie notice.


That was very awesome. Thank you for all of the ideas that you can do for reconstructing a building Again thank you for sharing the ideas... Keep them coming !!!!!
Very nice, I like what you did with the windows, that silver paint on the bottom looks great
Again,,,,,,,,,,,,,,,,JUST WOW!!
i AM LOOKING FOR THE SERIES OF BUILDING TAT YOU CAN PURCHASE AND DOWNLOAD THE PLANS
Very nice brief article. I've built the Metropolitan Bldg cutting the windows for an N-scale look.
Bridge building video
Nicely done!
looks good, nice finishing touches.