There are many factors to consider before we start building a model railroad layout. I know of many model railroaders who have started building without much of a plan and spent much effort and money on their layout, only to realize partway through that they just weren’t happy with their endeavors – and a lot of their efforts ended up in the trash. So... I think planning is very important.
In part 1 of this ongoing series on planning and building a model railroad layout, we looked at the all-important question of “Why do you want to build a layout in the first place?” In part 2, we’ll look at the tactical planning elements of a layout, focusing specifically on your track configuration.
Where should your layout be located?
When the passion for building a layout kicks in, I think the first question should be: “Where?” Finding a suitable space isn’t always easy. An extra bedroom? The garage? The basement? Build or buy myself a building to house my trains?
Then, the condition of the space is important. Is it big enough for my needs? Will the room or building need work before railroad construction can begin? How about the ceiling? The walls? The floor? What about the electrical supply and lighting? Heating and cooling? Do I want a train lounge for my buddies? How about toilet facilities? What will my wife think??!!
All of this may seem overwhelming but remember that this is YOUR layout. You can just disregard everything and forge ahead. Remember that model railroading is and always will be about having fun.
What track configuration should I have?
So there’s a lot to think about. But, once we get past all the preliminaries, we’re ready for the really fun part – the layout design. Steve and I thought we should run through the basic track configurations for those who might just be starting out. This may seem elementary to some, but I hope that you’ll hang in with us.
What follows is a list of nine of the more basic designs, complete with pros and cons for each.
CLICK HERE to download a handy PDF of these designs that you can print out and keep for reference.
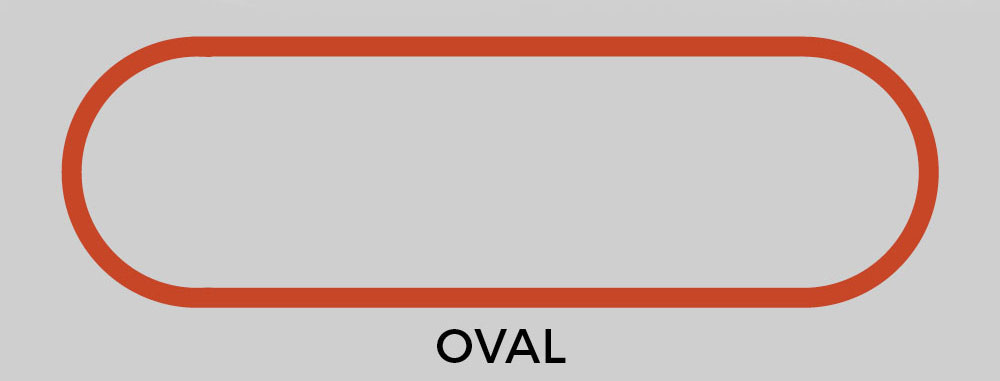
OVAL: The most common starter design. Lots and lots of continuous running.
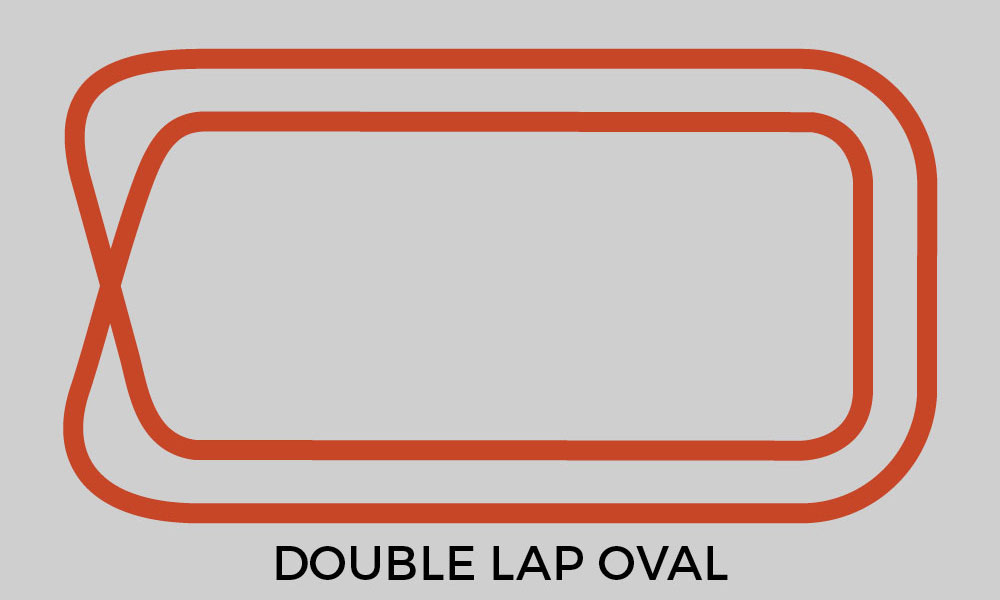
DOUBLE LAP OVAL: Doubles the “mileage” of the oval.
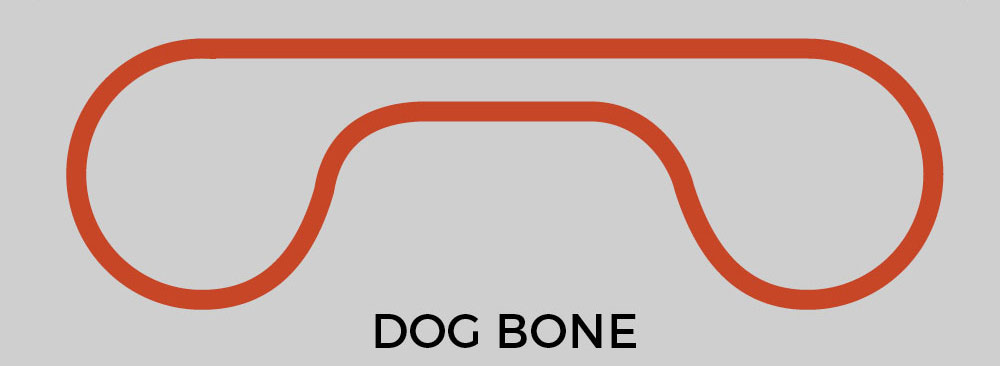
DOG BONE: Great for those who want a more accessible and straighter section in the center.
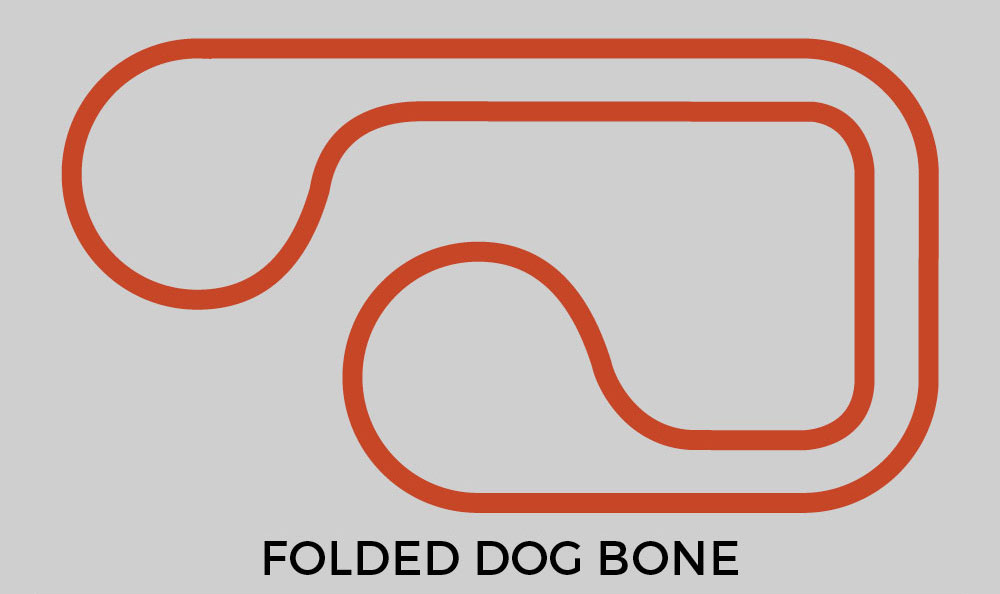
FOLDED DOG BONE: Dog-bone with center “accessible” area folded around the corner of a room.

POINT-TO-POINT: Most realistic design. You may need turning facilities at the ends depending on your motive power. No continuous running.

POINT-TO-LOOP: Adding a reversing loop at one end enables a return operation. You might need electronics to provide for the resulting mismatch of polarities at the loop.

LOOP-TO-LOOP: Same idea. This provides for continuous running with the proper electronics at the loops.

FIGURE 8: Classic design. This can be done with an at-grade crossing or as an “over and under” plan. The over and under may require some gradient considerations.
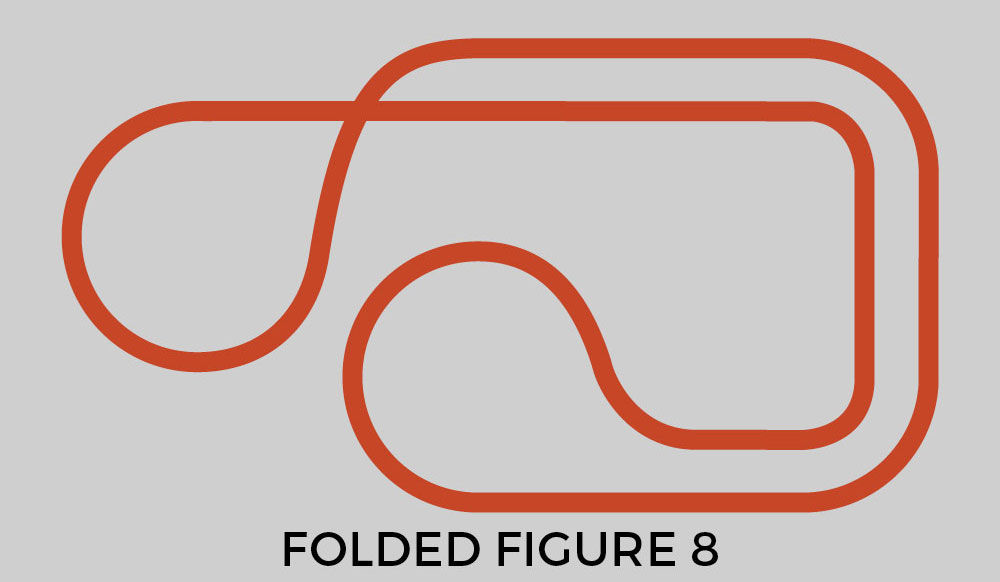
FOLDED FIGURE 8: This might enable the design to fit into a larger space.
What design is best for you, your space, and your railroad operations? Only you can decide, but take the time now to avoid ripping it out later!
Next time I’ll discuss “layout elements” that may help you settle on a particular design. Stay tuned.
More in this series:
So You Want to Build a Model Railroad Layout?
Choosing Model Railroad Track Configurations
Assigning a Theme for Your Model Railroad Layout
Ideas for Unique Layout Concepts
Tips on Trackwork
Helpful Tips for Model Railroad Wiring
Creative Ideas for Model Railroad Structures
I'm just getting started at age 70. I really only have 1 option for the location of my layout and that's the attic. I could fit a 4x8 HO layout without significant challenges, but it is really a seasonal situation since I live in NC and the attic isn't heated or cooled. I am also concerned that I would be in proximity to a propane furnace, which would preclude using any flammable vapors for scenery work in the colder months. For you experienced folks out there - does this sound workable to you?
I am switching from HO to N scale for a few reasons. I can only alot a 4X6 space which is already up with the HO trains on Bachmann EZ Track. I want to do a double run and incorporate more scenery with some elevation. After some study I am leaning toward Kato Unitrack. While not the most realistic, it may be the easiest to accomplish my track goals. I'd appreciate any feedback from 4X6 N Railroaders as to what track they are using, why and any pitfalls I haven't considered.
I need some advice for wiring a folded figure 8 double track
Brand new to model RRing, although it's been a dream of mine for many years. I bought my subscription to this site in hopes of finding useful information and links but it seems that everything requires more money!. I want to build in N gauge. I plan on a 2' x 3-4' space. I want a canyon look with mountains, farmland, waterfall, river, bridge and tunnels. I know this is an ambitious build for a newbie but I have faith in myself. I wish there was more info on inclines, curve radius, power requirements for everything, what can you "get away with", etc. Yes I'm more interested in the creation of the miniature scenario but I also love trains and want this as realistic as possible. Advice?
In the process of building a layout with seven separate loops on a two tier “L” shaped design 10x4 and 14x4
I had started on a layout, but found myself way over my head. The program you're offering is just what I need.
In full detail please as I have not done this before. Thanks
Just beginning
I would love to join but postage to the uk costs more than I’m buying. Not your fault I know but still.
Finally getting ready to break ground on Fn3 White Pass and Yukon garden RR using an old John Allen article